In this section we’re going to cover how the heads should be physically installed in your vehicle. Here’s the overall idea:
- They should be installed horizontally, not vertically.
- They should not be installed behind any bodywork or grills. The receivers and transmitters both need a clear line of sight in all directions.
- Your heads should be straight and level.
- They should not be pointed in or out. They should point directly ahead.
- They should not aim up or down. They should point straight ahead.
- They should be flush with your grill to a few mm ahead of them.
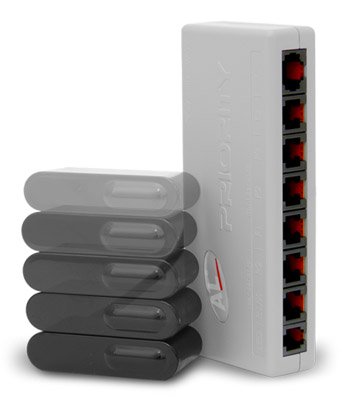
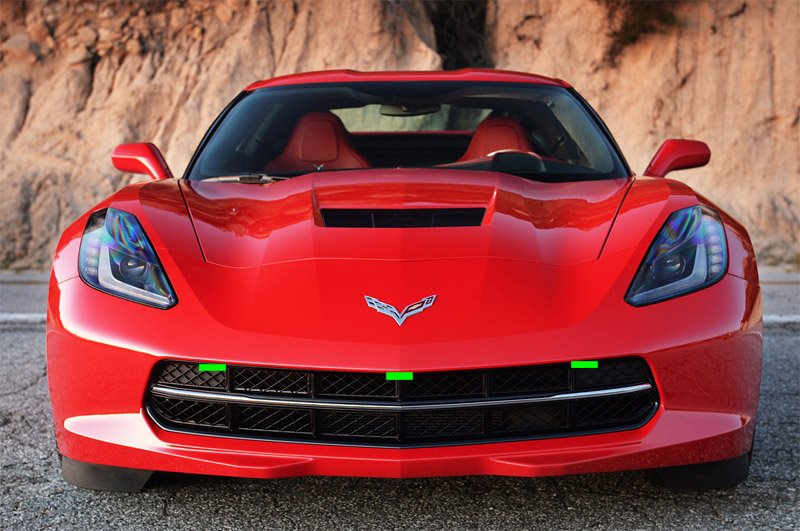
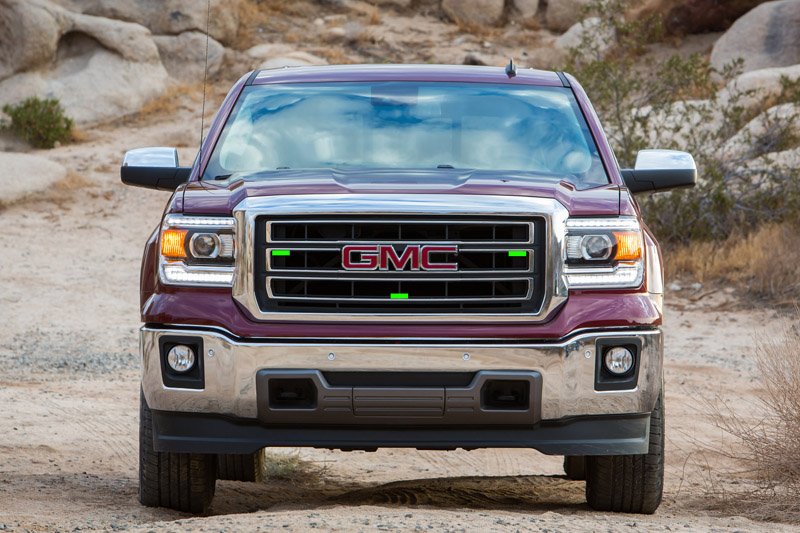
- Front center head (regular or Tx) should plug into F2 port of ALP CPU. Left and Right heads can go into F1 and F3, it doesn’t matter which.
- If using rear Tx head, it should plug into R2 port of ALP CPU. Standard rear head or heads go into R1 port.
Messing any of these up can mean the difference between being able to reliably jam lidar guns or not, so it’s important to do this properly.
I’d also like to add that not every installer knows these things. Many can do a fantastic job at wiring everything up and making everything look beautiful, but they may or may not necessarily know how to install jammers for maximum effectiveness, so that’s what we’ll focus on in this part.
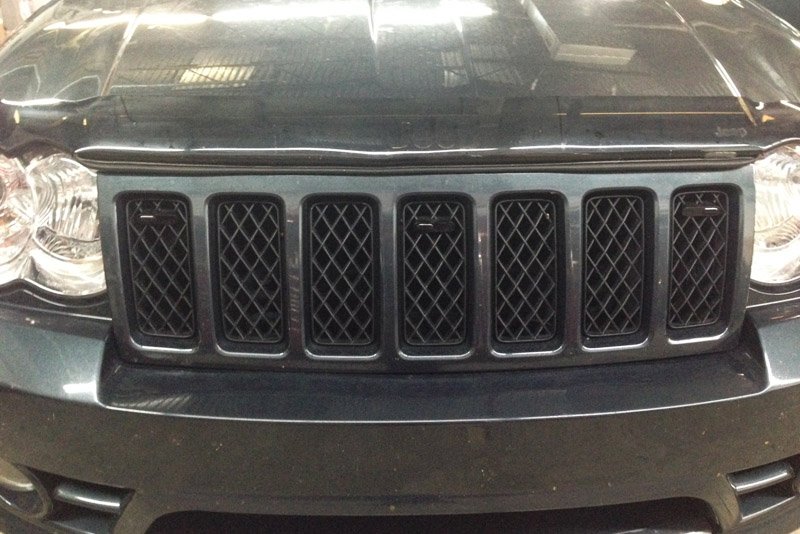
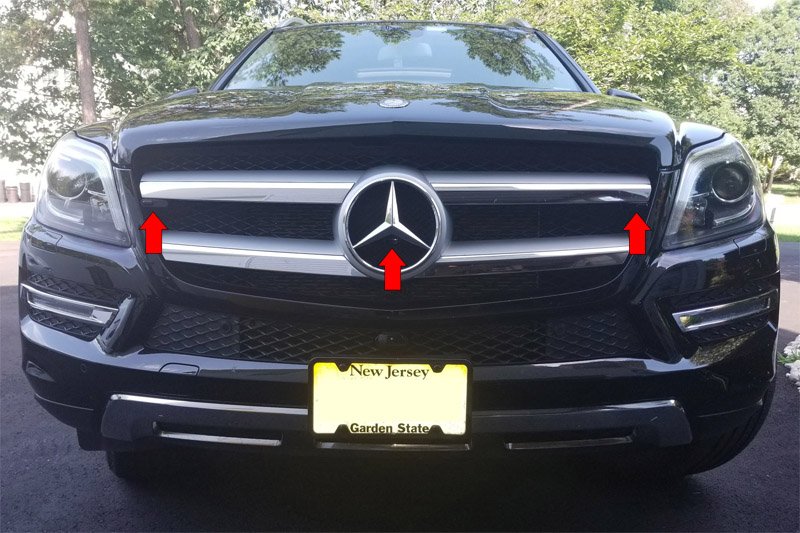
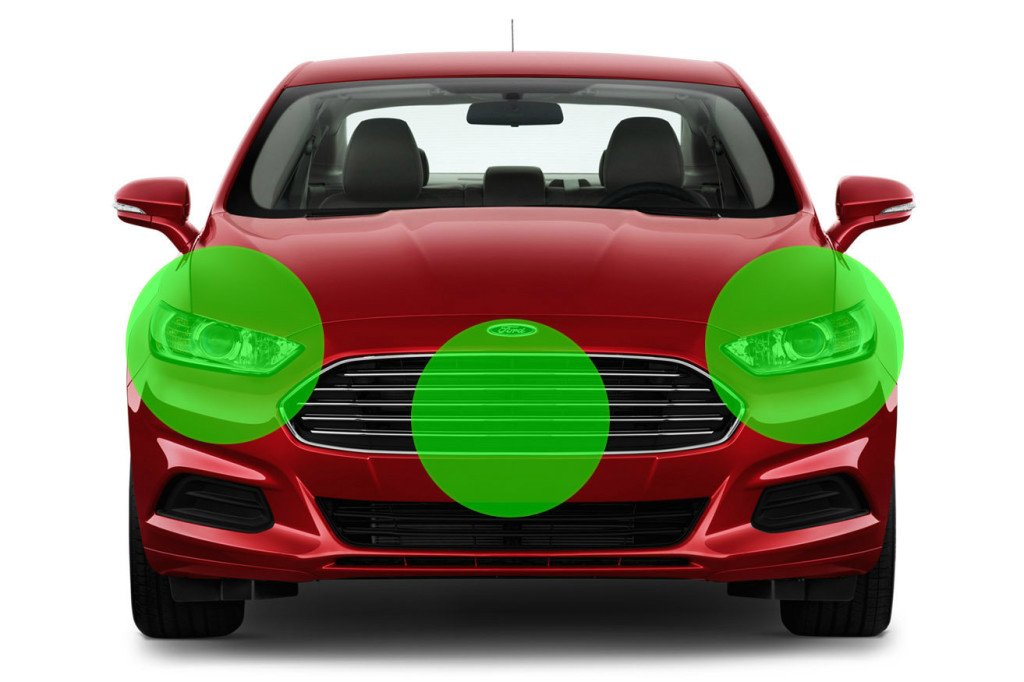
Can your Heads be installed behind your grill?
One of the most common mistakes I see people make is installing their jammer heads behind their grill.
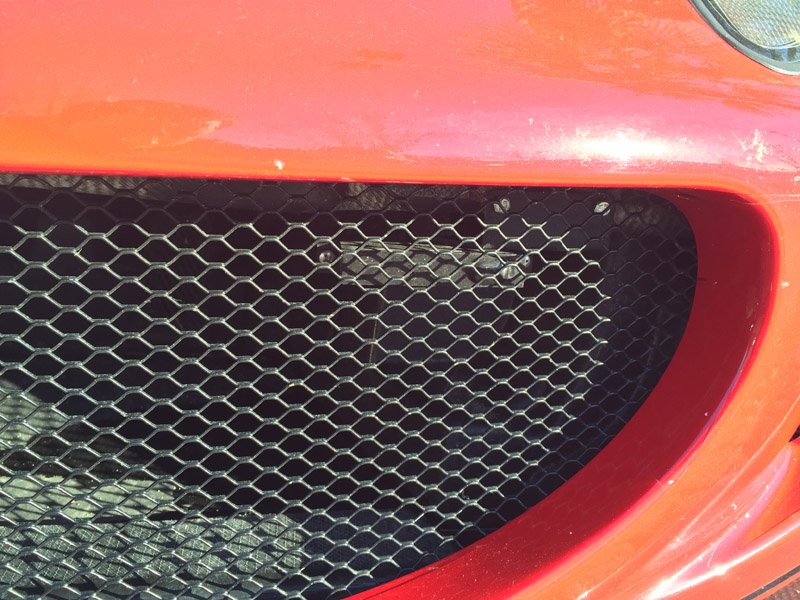
Laser jammer head incorrectly installed behind grill
This may be done for a variety of reasons:
- People don’t want to affect the look of their vehicle
- People don’t want to cut their grills
- People don’t want their jammers visible, especially if they’re in areas where jammers are banned
- People don’t know that this seriously compromises the performance of their install
If you put a laser jammer behind a grill like this, the grill itself will physically block the receiver from being able to see the incoming lidar beam well from every angle and it will also physically limit the transmitter from being able to send out its jamming pulses.
Here’s another example that will help illustrate the point even more clearly.
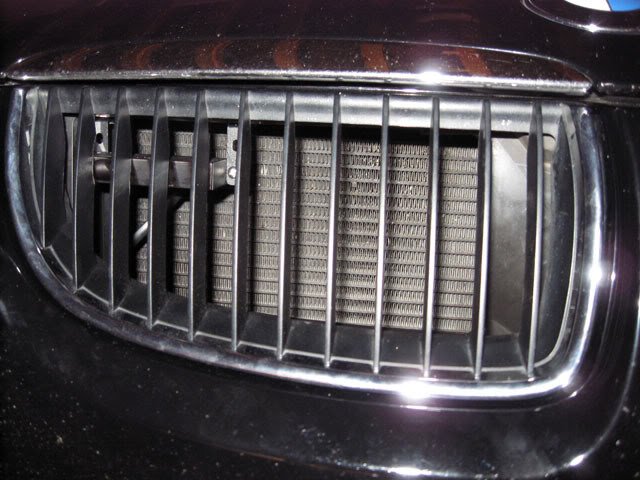
Laser jammer improperly installed behind a BMW grill
You can see right away what the issue is here. Sure you may get lucky if the angles happen to be just right, but this seriously compromises the install and although it would certainly be preferable to have your heads less visible for aesthetic reasons, you won’t have a properly functioning install and you will be wasting time and money.
There’s a common saying: “Stealth the car, not the install.”
Here’s a look at properly installed laser jammer heads.
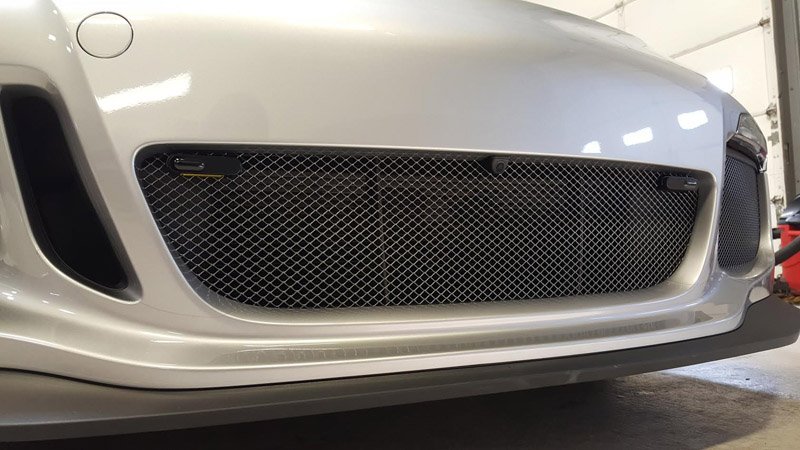
Jammer heads properly installed in a Porsche 911 grill (thx BRD & JK Automotive Designs)
Notice how professional this install looks. The heads fit nicely in the grill and they look like parking sensors.
Should your heads be pointed Straight, Up, or Down?
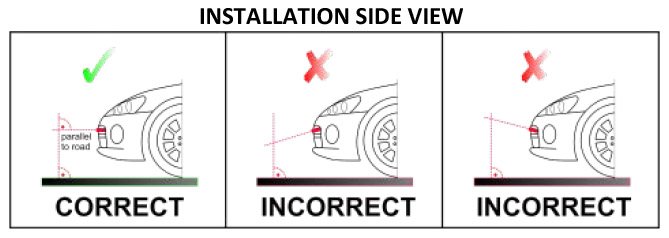
Jammer heads should be aimed parallel with the ground
You want your heads straight and level, parallel with the ground, aimed directly ahead.
I’ve done some testing with aiming the jammer heads up to see if it helps against overpass shots and while that does work, I got punchthroughs on level terrain. When I aimed my jammers straight again, they worked on both level terrain and from up at an angle.
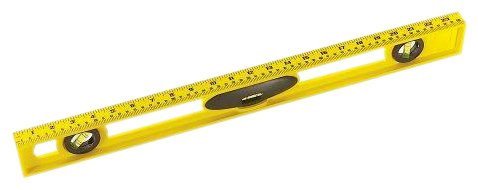
Aiming your jammers directly ahead is important for maximum performance and it’s for that reason that laser jammers come with a bubble level to help you check this.
The included bubble level can help you check your jammer positioning
Improper jammer head orientation is one of the biggest causes of punchthroughs in testing so this is one of the first things we look for when a PT happens.
Should your heads be aimed Straight, In, or Out?
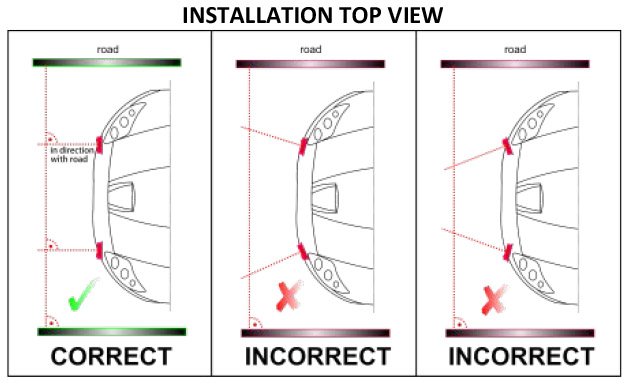
Jammer heads aimed forward, not in or out, left or right
Similar to what we talked about in the previous section, you want your jammer pointed straight ahead, not aimed left or right, both in or both out. Sometimes we call this having your heads toed in or toed out.
I’ve often seen heads toed out when people align their heads with the contours of their vehicle. Vehicles often curve back a bit (you’ll see it in the illustration below) and if you try to have your jammer heads parallel with your car so that it looks good, they may wind up pointing off to the side rather than straight ahead.
Now you may think that pointing your heads out slightly may help against officers sitting on the shoulder off on the side of the road, but we’ve actually found that jammers work best aimed straight ahead. Doing this gives you the most solid level of protection against targets both ahead of you and off to the side.
Jammer heads can be quite sensitive to misalignment and like I said, this is one of the biggest causes of punchthroughs.
It’s why jammers typically ship with adjustable brackets. Rather than supergluing them to your car or using 3M doublestick tape which doesn’t allow for slight tweaks once they’re set, using an adjustable bracket for your heads lets you fine tune your head orientation for maximum performance and then keep them solid in place once you have them where you want them. Using a sturdy yet adjustable mounting system is ideal.
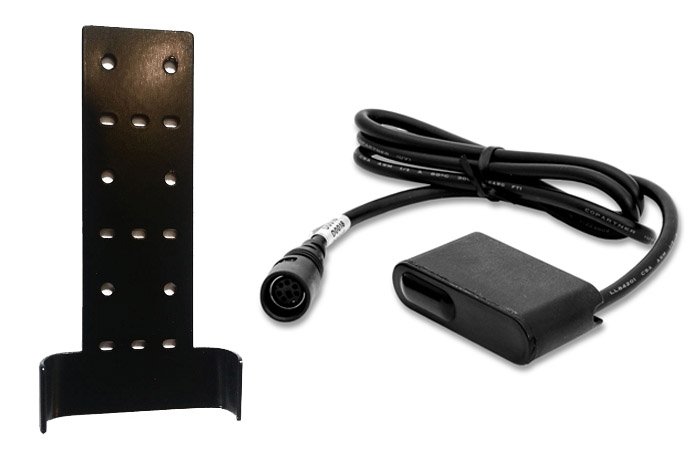
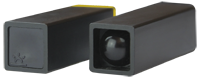
ALP head and mounting bracket
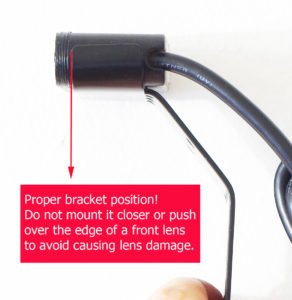
Make sure the front lens of the jammer sits just in front of the bracket, not in the bracket itself. Some people have cracked or damaged the lens by pushing it into the bracket itself with too much force. It’s best to let the lens sit right in front of the edge of the bracket.
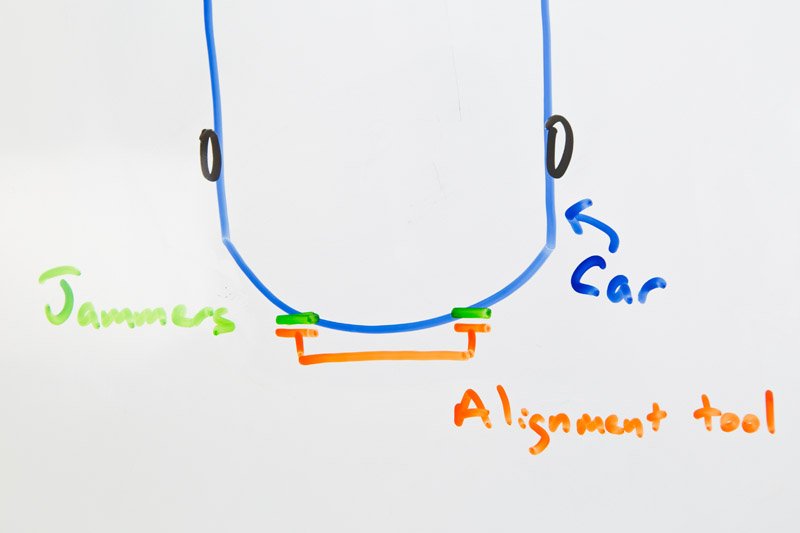
Quick tip: To make sure your heads are both pointed straight forward, use a long straight edge. I like using a long bubble level like this one because I can make sure they’re not only parallel, but also level with the ground. (You can also check to make sure the ground is level too.)
Some cars are rounded and stick out at the front so you may not be able to get a straight edge like this flush with your jammers because your car is blocking it. If that’s the case, you can make two extensions at 90 degree angles at the same distance apart as your jammers and that’s a great solution. Take a look at my crude drawing to better understand what I mean. 🙂

Lamborghini with ALP’s
Note: If you’re installing a third head in the center of your grill and that center head winds up farther forward due to the curvature of your car, that’s okay. They don’t all necessarily have to be on the same plane, front to back.
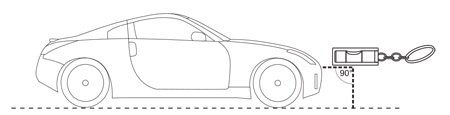
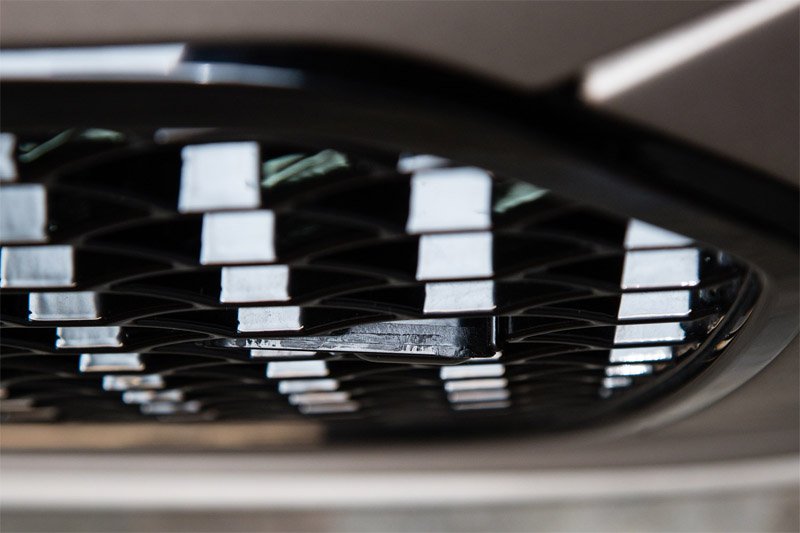
Should your heads be flush with your grill?
How far forward or back should you stick your heads?
Generally you’ll want the heads flush with your grill which looks good, or a few mm ahead of your grill. There’s two main things you want to look for:
- You want your heads to be able to see in all directions and not be blocked by any paneling.
- You want to make sure that your jammer heads are far enough forward so they aren’t getting reflections from your grill a few mm in front of your jammer head, especially if you have a shiny grill. Reflections could confuse the jammer.
A good rule of thumb is that if the lidar gun can’t see the jammer, your jammer can’t jam the lidar gun. So if you have any bodywork that’s physically blocking the view of the jammer in any direction, if there’s any part of the grill that could interfere with the jammer, that’s not a good location for it. Sometimes you’ll need to move your head farther forward so that it’s not being blocked by any body panels.
Here’s an example of a great install. You’ll notice how the head is mounted basically flush yet it still points forward as the grill curves back.
(The only thing to change would be to have the heads be just in front of the metal bracket.)
ALP head mounted, side view (thx @S6Per)
Here’s a look at the other head, looking down from the top. Notice how it’s just barely sticking out in front of the grill. Perfect.
ALP head barely sticking out, top view (thx @S6Per)
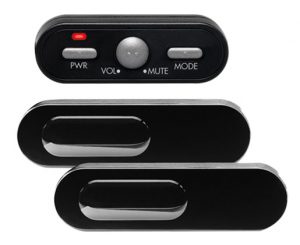
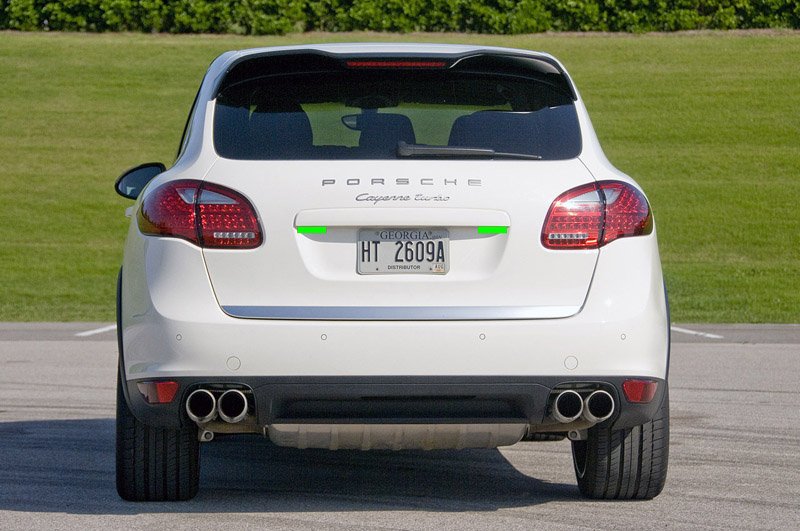
Bubbles In Or Out?
The ALP heads have bubbles on one side. The laser receivers are behind the bubbles. The transmitters are behind the flat side. Usually the school of thought was to have your bubbles out to get them closer to your headlights since those are your primary targets. If your jammers were super far apart, people would sometimes have their bubbles in to get closer to the center of the vehicle.
ALP heads are quite small and so it really won’t make a difference. This was more of an issue for older generation, wider jammers. At this point most people still go bubbles out since that’s what we’ve gotten used to, but ultimately it just comes down to what you feel looks best on your car. 🙂
Now that we know how to install our ALP heads properly, let’s go ahead and look next at how to set up the ALP, update it, and use it properly.
Continue on to Part 5: How To Register Your System
ALP Setup Guide Sections:


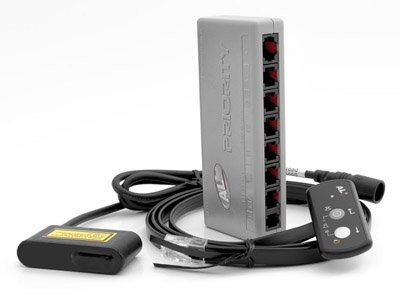 The ALP’s control box has ports for 3 heads up front. If you’re running only 2 heads up front, make sure you’re using only ports F1 & F2. Don’t plug either head into the F3 port.