So I just got off the phone with Blendmount today after having a chance to review their Blendmount. They liked my review and we had a chance to bounce some ideas off one another. One comment that people brought up about the Blendmount was the price so they gave me a Blendmount coupon code to help save you guys some money on the mount.
Blendmount Coupon Code
To save 10% off a Blendmount, use the coupon code Vortex10 at checkout.
It’s time for the AntiLaser Priority review. 🙂 While radar detectors are great against helping you avoid speeding tickets from police radar, they’re virtually useless against police laser. Radar detectors also have laser detectors built in, but against laser they’re little more than ticket notifiers. As soon as they go off, your speed has been acquired and you won’t get any warning ahead of time. Additionally, because a laser beam is so small, there’s a good chance that your radar detector may not even go off at all if an officer is shooting your license plate or headlights and your radar detector is up on your windshield. If a police officer is using laser (and laser is used all over the country), you need to pair a laser jammer with your radar detector.
A laser jammer is designed to fire back at a police laser gun, jamming it, and preventing it from displaying a speed. When your jammers go off, you slow down to the speed limit, quickly turn off your jammers, and allow them to get a reading off your car doing the speed limit. They have no idea that anything weird happened, they see you doing the speed limit, and they shoot the next car in line. Simple.
There’s several laser jammers on the market from a variety of companies. Everyone wants to say that they’re the best, they can jam all the lidar guns out there, and so on… but which one really is the best?
AntiLaser Priority Review
If you want the quick answer, the best jammer on the market is the AntiLaser Priority. They’re the ones that countermeasure enthusiasts are all buying and they are the most effective jammers when it comes to jamming all the different lidar guns on the market, including the latest guns with sophisticated anti-jamming technology. Additionally, unlike many other companies which provide very limited support in terms of updates over time after they sell you a jammer, AntiLaser is very good about staying on top of things and issuing updates to make sure that your jammers stay current and able to jam all the known guns out there which is critical. They spend tens of thousands of dollars every year buying new laser guns so that if something changes in terms of laser guns, you’ll quickly get an update for your jammers to keep you ahead of the curve. Laser jammers are something that need to be updated periodically as things change and so long term updates are very important.
Compared to the previous generation laser jammers out there, the ALP is also more sensitive at detecting lidar than other jammers which means that they’re better at protecting your entire vehicle, the increased sensitivity means you’re less likely to have a weak spot on your vehicle far from the jammer that a gun can get a reading off of, you have more options in terms of placement of the jammer heads on your car while still maintaining solid protection, plus they’re more forgiving of less than perfect installs or heads moving over time which can lead to punchthroughs (a lidar gun getting a reading off your car while your jammers are trying to jam it). Because the ALP’s can run up to 6 heads instead of 4 (up to 3 per side of the vehicle), it means that if you need more than 4 heads (common for larger vehicles), you can simply add an additional head rather than having to buy another system entirely which is more expensive and leads to more unnecessary duplicate hardware in your vehicle, dual kill switches, and so on. Being able to plug additional heads into a single ALP brain is great.
The ALP also has a bunch of accessories available that helps add a lot of useful functionality. For example, you can integrate it with a variety of different radar detectors to have just one setup for both radar and laser, you can get voice alerts with the HiFi module, you can pair it with your phone over bluetooth if you don’t want the control pad installed in your cabin, and so on. If you want a fully integrated radar/laser setup, there’s now also the Net Radar available which is a very good radar detector so you can have a complete radar and laser system for your car that’s good in both departments.
These are the jammers that just about everyone in the enthusiast community is now running, myself included. When it comes to laser jammers, there isn’t really the same level of competition that there is with radar detectors.
ALP duals installed on a 911, image courtesy of BRD & JK Automotive Designs
What About The Other Laser Jammers?
The previous top jammers were the Blinder HP-905 Compact and the Laser Interceptor.
The LI’s were the previous top jammers on the market and they were the best for many years. They were the jammers to get. After some time, the heads started showing their age, especially as new anti-jamming lidar guns like the DragonEye started coming onto the market and the LI’s weren’t able to respond accordingly due to them using older hardware. That was around when AntiLaser stepped in with their far more sophisticated hardware with the ability to jam these new guns while LI basically threw in the towel. The US distributor is now no longer even involved with LI’s and is now involved with Stinger. Stinger makes what is currently the second best jammer and I’ll talk about them in just a moment.
When the LI was popular there was also the Blinder HP-905. These were similar in capability to the LI’s and their main advantage was the fact that they offered smaller heads. This meant for a less visible install and also made it easier to install the jammer heads in grills where the LI’s were too large to fit. This was the reason I went for HP-905’s over LI’s and they saved me every time I needed them. I’m glad to have run them. The main drawback is that Blinder’s history of updates is pretty lousy and they would claim to be able to jam certain lidar guns like the Poliscan when in reality they couldn’t. They’re just not very good at keeping their jammers updated over time (there hasn’t been an update for several years now) and this is something that you really do need to look for when selecting a jammer. So the lack of updates along with the inability to jam some of the newest guns on the markets is what is having people move away from the Blinder units. It’s why I switched.
To save some cash, you could always get one of these other systems, especially a used one. Generally though, I wouldn’t recommend it. There’s two reasons. Number one, you often have to drill holes into your grill for the jammers and potentially your interior for the controls. That’s not something that’s easy to undo and change once you need to switch systems. Additionally, the install can be a PITA when it comes to running the wires through your firewall, mounting the heads on your car, potentially having to remove your bumper, and so on. You can do it yourself which takes a lot of time, or you can have it done professionally which takes a bunch of money. I’ve seen some people doing professional installs where the install costs more than the jammer itself! Uninstalling down the line to switch over is a pain and it’s for that reason that I’d recommend that you do it right, right from the get-go. The peace of mind of knowing you’re protected is a big part of it too.
When it comes to good jammers that would be worth installing, the only other company that’s producing laser jammers that can deal with the latest lidar guns is Stinger. The Stinger VIP radar detector is an advanced radar detector and it also offers laser jammers that are designed to pair with the radar detector (unlike the ALP’s which are designed to be standalone but also have the ability to integrate with several different detectors). The Stinger’s laser jammer heads are smaller than the ALP, about the size of a dime, and they even offer ridiculously tiny fiber heads that are only 2.6mm wide so they’re easy to conceal and almost impossible to spot.
It’s more expensive for the Stinger system, but these tinier heads make for a popular choice among those who want the stealthiest install possible where the jammers don’t take away from the aesthetics of the car as much, especially with those who drive higher end or exotic cars. Stinger uses separate transmitters/receivers so while each head is smaller, you have twice as many of them. The main limitation right now with the Stinger jammers, and why they’re not the best, is that their software is still in development and their jamming capabilities are not yet totally solid. There’s users who are still reporting that they can’t completely jam lidar guns on a consistent basis, especially at closer range. The Stinger engineers have been pretty good with issuing updates which is awesome so I do expect them to be solid down the road, but they’re just not there quite yet and it’s for that reason that I’d recommend the ALP’s today by default.
As for the other jammers out there, you’ve got the Escort ZR5 and ShifterMax jammers (what they use with the Max Ci and Max Ci 360) which is a step forward from Escort’s previous ZR4’s and LSP’s, but still lags behind the ALP in terms of jamming effectiveness (most importantly) and support for more heads for larger vehicles. The K40 Defuser Optix is using last gen hardware that also doesn’t have the ability to jam the latest guns out there either.
If you’re looking to buy a jammer these days, the ALP’s are the go-to solution. The only other ones that would be worth recommending would be the Stinger VIP if you want the smallest heads possible and are also getting their radar detector. Other than that, the ALP’s are the ones to go for.
How Do They Perform?
How well do the ALP’s jam lidar? Well they’ve been tested very thoroughly by this point. At first testing was done to see if the ALP’s actually lived up to their claims of being able to jam the tough guns that other jammers couldn’t. Then as more and more people started picking them up for their own vehicles, they’ve been tested even more and we see them tested regularly in different testing events. Because they’re so good, they’re often the only jammers you’ll see at testing events.
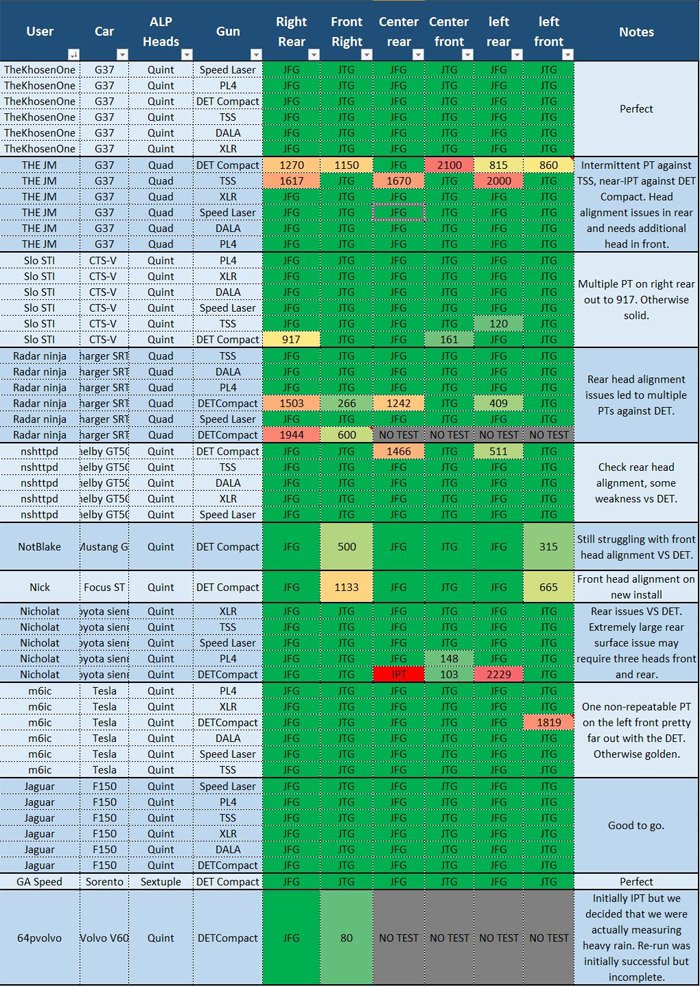
As far as their effectiveness is concerned, they are good at jamming both the older easier guns and the newer tougher guns. Take a look at some sample test results from a lidar test meet.
You’ll notice that everyone is running ALP’s there, and for good reason. You’ll also see that it’s mostly green on the chart. Dark green means that the lidar gun was never able to get a reading whether they’re driving towards the gun (Jam To Gun, JTG) or driving away from the gun (Jam From Gun, JFG). This is what you want to see in testing, but you never actually want to do this in the real world. You want to slow down and let them get a reading off you at some point. See here for more info on using your jammers properly.
You’ll also see that some people had punchthroughs where the gun was able to get a reading. This is usually due to heads not being aligned straight. It can also be due to heads not being placed on the ideal location on their vehicle to provide full coverage. It’s for this reason that proper installation is key and testing is important. My ALP setup guide covers all of this.
In any event, as you can see, when the jammers are installed well, they perform great. In some of the cases where punchthroughs happened, they were at pretty close range meaning that even in those situations, the driver would have enough time to slow down and kill their jammers anyways so they would help the driver avoid a speeding ticket.
A Closer Look at the Jammers Themselves
So we’ve looked at the performance of the jammers which is the most important part. Let’s take a look at the jammers themselves.
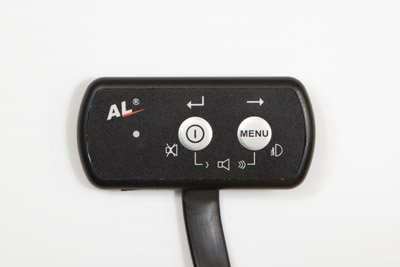
When they’re installed in your car, there’s not really much to see. You’ve got the jammers themselves which you install in the front as well as the rear if you want full protection, you have a control pad with two buttons and a little status LED, and an additional external LED you can place somewhere easy for you to see. Let me show you how it looks on my car.
Two jammers in the upper grill of my Miata
Two rear ALP heads on either side of the rear plate
Inside my car I have my control pad placed right in front of my shifter. It makes it super easy to get my hand to it quickly without looking, find it by feel alone, and press the buttons to change settings or kill my jammers as needed. The external LED I’ve placed in my instrument cluster so I can see it lighting up without taking my eyes off the road. I’m thinking of moving it up on the dash where it meets the windshield so that my dashcam can see it too.
Overall I really like the system. I’ve had it installed in my car for a few years now. Since I bought it, it’s had a number of really nice upgrades and AntiLaser keeps adding new features, adding support for new guns, and the product keeps getting better and better.
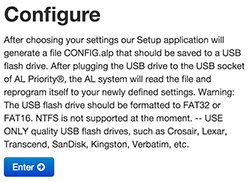
I really like that you can do all the configuration on your computer, copy your settings over to a USB drive, and plug that USB drive into your jammers. So much better than before! With previous jammers you had to take a laptop out to the car and update it there. With some you even had to have an internet connection to download updates (you couldn’t download them ahead of time) so you had to park somewhere close to where you could get WiFi. Some also used a serial port instead of USB, something many modern computers didn’t have so you’d need a USB to serial port adapter. The new method with the USB drive is so much better. If you get the Bluetooth module, you can even change settings or update the jammer’s firmware through your phone which is awesome.
There’s also some nice accessories you can pair with your ALP. I use the HiFi module which includes an external speaker which is not only louder, handy if you’re out on the highway with the windows down and the music up (it can automatically mute your stereo too if you wire it up to do so), and it also gives you voice alerts to make it much easier to navigate the menus. You’ll also get notified of what gun you get shot with when you get shot. Super handy. Some other jammers include the speaker as part of the standard equipment, but with the ALP it’s an optional extra.
Another option is the ability to add a Bluetooth module and pair it with your phone for a visual display. Here’s a video comparing the ALP using the Bluetooth option on both iOS and Android, as well as the HiFi module.
Two updates after this video was released:
If your phone is not connected, the jammer now falls back to the control pad so your system is always up and running. It no longer shuts off altogether if the app isn’t running.
You can now use the BT module and control pad simultaneously to a certain extent. You can be connected via your phone and use the menu button on the right side of the control pad to JTK when you get shot so you always have a dedicated JTK button. Awesome.
Integrating the Net Radar radar detector
If you want a fully integrated radar/laser installation, they make a radar detector specifically designed to pair with the ALP called the Net Radar. Not only do you get a cleaner looking cabin and a more OEM look with less clutter, but there’s no detector to put up or take down, nothing on the windshield to potentially get stolen, nothing visible to police officers, and so on.
The Net Radar offers very good performance, excellent blind spot filtering, has the option of adding a second rear antenna for improved rear detection and arrows, and even a third antenna specifically for the MRCD for people in Alberta or Quebec where this new low powered radar gun is in use. It also comes with some of the additional accessories you need like the GPS antenna for low speed muting and the Radar/GPS (RG) module to plug the antenna into the ALP while the other antennas require you to purchase the accessories separately at an additional cost. If you also pick up the Bluetooth module, you’ll also be able to do manual GPS lockouts using your phone so that you can teach it where the false alerts are located and it will automatically mute them for you in the future.
If you like, you can watch a quick demo of both radar and laser alerts on the ALP. This setup shows you what you’d see if you pair your phone to the ALP with the Bluetooth module. The audio alerts are exactly the same if you were using the HiFi module.
Conclusion
These are the most effective jammers on the market these days. They’re the ones that people who know about laser jammers buy. They’re the ones that people who use previous generation jammers are upgrading to. If you want to know what the best jammer is, it’s the ALP. I wish recommending a radar detector was this simple. It would make my life so much easier, lol… 😀
The jammers are able to jam all the known guns on the market today, they are continually being updated as new guns are released and when there’s helpful new features and accessories to be added, their customer service is top notch, the heads are pretty small so they’re not very noticeable, and with the ALP’s you’ll be set up for both the short term and the long term as much as possible.
A Couple Quick Laser Jammer FAQ’s
A couple quick frequently asked questions for those of you looking to get these jammers now.
A: You can look here to see if they are. I understand that’s a concern for people. I don’t recommend breaking the law of course, but remember that speeding is illegal too. In fact the penalties for speeding are far worse than having jammers (higher ticket prices, insurance hikes, potential court costs, etc.). The penalty for having a jammer is typically the equivalent of a “fix it” ticket, similar to having window tint that’s too dark or missing a front plate if you need one. Additionally, if you use your jammers properly as explained here, they won’t know you have them in the first place and you’ll be able to drive away just fine after you get shot.
Q: How do I install these jammers?
A: You can do it yourself or hire a professional. It takes some time to run the cables through your car, wire everything up, power your jammers, find a suitable location for your jammers, and install the controls inside your car. Some cars are easier than others. If you want a professional to help, make sure you’re both on the same page as to how you want the install done. 🙂 See this section of my ALP setup guide for more important installation info.
Q: What happens when I get shot with laser?
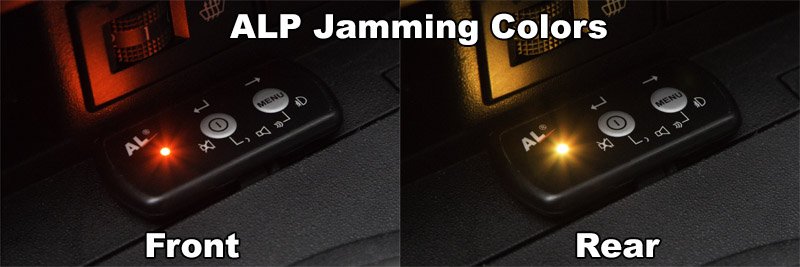
A: An alarm will go off in your car using the ALP’s speakers. The LED’s will also light up. They’ll be red when you get shot in the front. If you have the rear jammers, they’ll light up yellow. If you have the HiFi module or Bluetooth module, the jammer can also announce which gun you’re being shot with and if you’re being shot in the front or in the rear. Your goal then is to slow down to the speed limit as quickly as possible and kill your jammers, allowing the officers to get a reading off your car doing the speed limit. This process is called JTK, or jam to kill. You jam them until you kill your jammers.
You can kill your jammers manually by pressing either button on the control pad, by tapping on the phone’s screen if you’re running the app, or by letting the ALP automatically kill the jammers for you. When configuring your ALP, you can select how long it will jam for before automatically stopping jamming. You’ll want to get this process down to about 2-3 seconds. Most people set their jammers to automatically kill after 4 seconds, maybe 5 seconds max, as a backup to manually killing their jammers. When the alarm goes off, brake, and when you are down to the speed limit, kill your jammers.
Buying the AntiLaser Priority
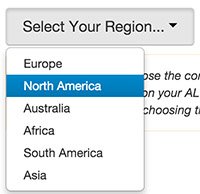
If you’re looking to buy the ALP, make sure you buy it for your region. Prices vary in different areas, but ALP’s are region locked so they’re different if you buy them in the US, Canada, Europe, Australia, etc. They’re only designed to work against the guns in use in your region and so ALP’s are only sold from specific dealers in your region.
You can buy them from a local dealer/installer in your area if they carry them, but what I did was buy online. They start at $750 for a dual head setup. I recommend Tom who’s the main guy here in the States for the ALP, knows all about them, and would be the man to talk to when it comes to customer service, warranty support, installation, answering questions, and so on.
If you live in the USA, you’ll need to order them from Tom at ALPriorityUSA.com.
If you live in Canada, you’ll need to order them from Alex at KMPH.ca. (Save $50 with the coupon code “VortexRadar50”)
You can buy the ALP there, as many heads as you need, as well as any accessories you’ll want to pick up.
I have a comprehensive ALP setup guide designed as a followup to this AntiLaser Priority review to help you buy what you need and get your jammers installed properly so that they can work most effectively. Definitely check that out. Before you buy, check out the section of the guide going over how many heads you need as mentioned earlier, that way you know how many you’ll need.
Enjoy your jammers, get them installed properly, use them correctly, and they should treat you well for years to come.
If you’re in the market for a laser jammer and you’re looking for the best performing jammer available, the AntiLaser Priority is the one to get. It is the go-to recommended laser jammer.
In this post we’re going to go over the main AntiLaser Priority components as well as the optional AntiLaser Priority accessories available.
Updated: Mar 2018
Note: This pricing is for American customers only. Pricing varies in different countries. Additionally, ALP’s are designed to be used only in the region they’re purchased, so if you need protection against European guns, you’ll want a European ALP. They have Australian ALP’s, American ALP’s, etc. This guide focuses on the American ALP, but the same ideas will apply to international ALP’s. 🙂
In the US you can purchase the ALP online directly from ALPriorityUSA.com.
In Canada you can purchase the ALP online directly from KMPH.ca.
AntiLaser Priority Components
AntiLaser Priority System: $499 – $1499
This is the main kit. The price varies depending on how many laser jammer heads you want to purchase.
1 Sensor – Recommended for motorcycles, $499
2 Sensor – Recommended for small to medium vehicles for front protection, $749
3 Sensor – Recommended for medium to large vehicles for front protection, $999
4 Sensor – Recommended for small to medium vehicles for front & rear protection, $1249
5 Sensor – Recommended for medium to large vehicles for front & rear protection, $1499
For those of you who encounter the DragonEye laser guns and/or want a third head for the rear of your vehicle because you have a larger vehicle and two heads don’t offer sufficient coverage (ie. a truck or SUV), you can pick up a Tx sensor.
The Tx (short for transmit) is a special tiny sensor (even smaller than regular sensors, about the size of a quarter, that have 3 separate transmitters inside.
If you encounter the DragonEye guns, you’ll want 3 heads per side of the vehicle. The ALP supports 3 heads up front and you can replace the middle standard sensor with the Tx head for even better protection against the DragonEye. For the rear of the vehicle, the ALP only supports two heads, so you can use two standard heads (which both plug into one of the rear ports of the CPU using a splitter) as well as the Tx head in the center (plugged into the other rear port of the CPU) and achieve solid protection both front and rear.
Additionally, for those of you who need a third head for the rear, the ALP doesn’t support 3 normal heads, even with a splitter, but you can do two normal heads and one Tx sensor for the rear to get full protection for the rear of your larger vehicle.
The HiFi module adds an external speaker to your ALP to give you not only louder alerts which you can hear better over any music or road noise, but it will also announce what gun you’re being shot with, it makes it easier to navigate the menus since it tells you what menu option you’re accessing (otherwise you have to look up what different beeps and LED colors mean), and it allows you to use several different profiles at once so you can quickly switch settings on the fly.
It’s a replacement for the standard control pad that comes with the ALP. The standard control pad has a little buzzing speaker inside it. The HiFi module comes with an upgraded control pad that hooks up to the external speaker.
It’s a highly recommended addon.
Here’s a comparison between the standard control pad and the HiFi module. Note: All current control pads and HiFi modules now offer the ability to dim their LED’s and the external LED. My older original control pad didn’t so you can ignore that part in the video below since the ALP has now been updated. 🙂
You can plug in a GPS antenna to add some speed-based functionality to your ALP. For example, you can give yourself low speed muting for radar, have your laser jammers automatically disable at low speeds, have your parking sensors disable at higher speeds, plus the GPS antenna is required for the Tx sensors. Additionally, you can have your ALP log how fast you were going when you got shot so you can see how big of a save you got and the ALP can also function as a VBOX and measure your vehicle’s 0-60 times, so there’s a bunch of useful features that the GPS antenna offers.
The RG module is designed to allow you to plug in your Net Radar radar detector antenna into your ALP if you’d like to add a radar detector to your laser jammer and have an integrated radar and laser setup. The old version of the RG module (RGv2) supported antennas such as the STi-R Plus, 9500ci, Radenso HD+, and V1, but that module has been discontinued and most of those radar detectors have since been discontinued too. The latest version of the RG module (RGv3) is specifically designed for Net Radar and Net Radar DSP integration and so if you want a radar detector to pair with your ALP, the latest version of the RG module you’ll see online is the one to get.
If you’d like a fully integrated radar and laser package to install in your car while keeping your windshield and interior looking clean, there’s several different remote radar detectors that you can install that also go in the grill of your car like the ALP heads. There’s the high performance Net Radar DSP and the more affordable original Net Radar. Both are very capable radar detectors that plug right into your ALP and share the same controller and display so you don’t need to install additional components in your vehicle’s cabin. The Net Radar DSP is the newer and more popular option so let’s start with it.
It offers long range performance, good blind spot filtering capabilities, as well as MRCD detection capabilities. It is also effectively stealth to radar detector detectors. Its biggest appeal though is that it’s designed for the ALP which is the laser jammer that most people are going to get anyways so it’s the go-to choice, plus it offers the performance of remote radar detectors that cost thousands of dollars, yet it’s available at a fraction of the price.
To run it you’ll need the R/G module as well as a GPS antenna. AntiLaser sells a package with all three components to give you everything that you need. If you’d like to get directional information, order a second antenna for the rear as well and it will plug right into your R/G module too.
Note: If you do a lot of driving in urban areas, I’d recommend you get the Bluetooth module as well (covered below) which adds GPS lockouts. This way you can run the iOS or Android app and your phone can learn all the false alerts from shopping centers and speed signs that you regularly drive by and filter them out for you in the future.
Net Radar (original) Radar Detector Add-On Package: $549
Prior to the Net Radar DSP we had the original Net Radar antenna. It was a capable radar detector too, but it’s more of a mid-tier performer rather than a long range detector. It also lacked MRCD capabilities (important for Canada) and so MRCD detection required a second dedicated MRCD-only antenna.
Now that the Net Radar DSP is available for only $100 more, that is the way that most people go. However, the original Net Radar is still a capable detector, it’s more affordable, and not everyone wants crazy long range.
Speaking of saving money, you can also opt to get a Net Radar DSP up front and an original Net Radar for your rear antenna. This will save you $100 over getting a pair of NR DSP’s and yet you’ll still get your arrows. Long range detection is less important in the rear than in the front. Having two NR DSP’s is still optimal since both antennas will be equally sensitive, but if you don’t mind your arrows taking an extra second or two to flip after you pass the source (because the rear antenna will be less sensitive), you save a little cash and do a regular NR for the rear.
The bluetooth module allows you to pair your ALP with your phone and it works on both Android and iOS. With your phone you can update your ALP’s firmware directly through the app rather than needing to download the update on your computer and transfer it to your ALP with a USB drive. You can also adjust your settings through the phone while sitting in the car. Like the HiFi module, you can add voice alerts, except the audio will now play through your phone’s speaker or through your car’s stereo over Bluetooth. Here’s a quick demo of how the alerts look and sound over Bluetooth:
As you can see, when using the Bluetooth module, you can see what frequency your radar detector is picking up and what lidar gun you’re being shot with.
You can also review your logs much more easily and see what gun you were shot with after an encounter. One of the biggest benefits is that if you’re using radar with your ALP, your phone will give you GPS lockout functionality so your phone can learn where the stationary false alerts are located around town and mute them for you when you pass by again. This is an invaluable feature for people who drive in urban areas.
One thing to be aware of is that when you’re connected to your phone via Bluetooth, it takes over for your dedicated control pad (both regular and HiFi). Luckily you’ll still be able to use the menu button on the control pad to kill your laser jammers when shot, but all the other functionality for the ALP such as powering on and off, changing settings, or muting radar alerts will be handled by the phone instead of the control pad. Also, if you plug the HiFi module into the Bluetooth module, the HiFi module’s speaker will not work. Audio will go completely though your phone and out through your vehicle’s stereo. I personally like having HiFi too for times when I’m not running the app and so it falls back to HiFi and the audio sounds identical to Bluetooth, but there are some limitations to running Bluetooth and HiFi simultaneously.
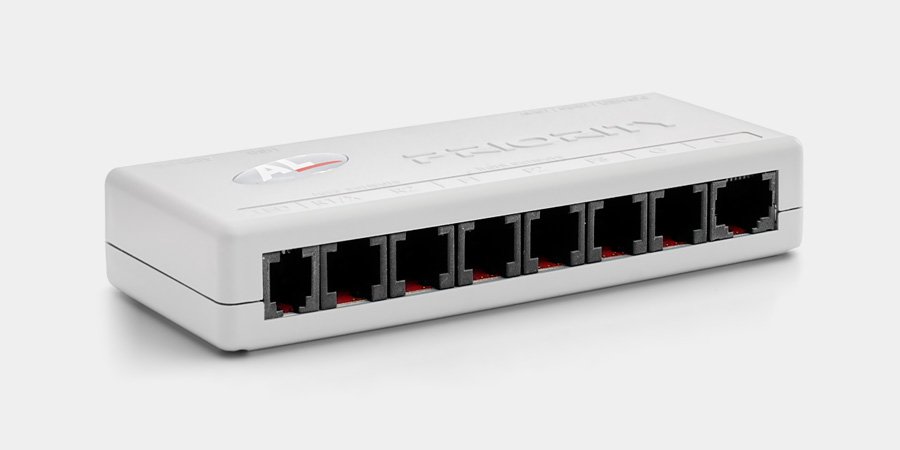
The cables that connect the ALP heads to the CPU are 5m (16.4 feet) long. This is generally enough for connecting the front heads, but for some vehicles you may need an extension cable for the rear heads, especially when you are running the wires under and around the trim of your vehicle. The extension cable will add an additional 2.5m (8.2 feet) of length. You’ll need one extension cable for each head you’re extending the length of.
If you want to test your ALP and verify that the heads are working, having a device that can trigger your ALP is very handy. This pocket tester simulates the pulse pattern of a bunch of different lidar guns. It’s great for not only verifying that your ALP works properly, but also to troubleshoot if you suspect that one of the heads isn’t responding to lidar. The ALP does its own self-check and will let you know if a head fails at any point, but this is a great add-on as well.
This is not a substitute for testing your ALP’s with an actual lidar gun, however. This will let you check each head individually to ensure that it’s plugged in and responding to laser, but it will not help you verify that your ALP heads have been installed properly so that they can jam the laser gun effectively. Make sure that you follow the installation instructions in the ALP manual and in my comprehensive ALP setup guide.
Finally, the last accessory to consider is a wireless Bluetooth button called the Flic that adds a dedicated control button to your ALP to let you do things like kill your jammers, mute or lock out your radar alerts, and power the system on and off.
The button is especially handy for those running the Bluetooth module because when doing so, while you can still JTK with the dedicated control pad, you’ll lose the ability to mute or lock out radar alerts. The only way to control your radar detector otherwise is via the app and it’s not always convenient to switch apps or tap on your phone’s screen while driving.
The Flic is a small button you can stick somewhere in your vehicle (ie. on the dash, behind your steering wheel, etc.) so that you always have a dedicated button on hand to remotely control your ALP while it’s otherwise being controlled by your phone. It can do lots of other things too like control your music and stuff like that. The ALP now interfaces with the button as well so you can use it to control your laser jammers and radar detector as well.
The AntiLaser Priority is arguably the very best laser jammer system currently available on the market. It’s offers the highest level of protection against all known lidar guns. Lots of jammers advertise that, but this one of the few that can actually jam not only the standard older lidar guns in use, but also the newest lidar guns that are designed with sophisticated anti-jamming software. Additionally, AntiLaser is very good about continuing to keep it current with firmware updates as new guns come out on the market. The update process is much better than with other jammers, the lidar heads are more sensitive than competing jammers which means they’re more forgiving to installation issues, the jammer can integrate with a number of popular radar detectors, their customer service is excellent (which is very important if you need help installing and using your jammer).
In Canada they’re available for sale from KMPH.ca. (Save $50 with the coupon code “VortexRadar50”)
There’s a bunch of reasons why these have become the most popular jammers on the market and the standard go-to for enthusiasts all around the world, but the main reason is that as purely a laser jammer, which is the main thing you’d need this for, it’s simply the most effective jammer out there at helping you avoid speeding tickets from police officers shooting with laser guns.
Now just because you buy the best jammer on the market does not mean that it will work when you install it. You need to keep it updated against the newest guns, you need to install it correctly so that it can do its job effectively, and you need to know how to use them so that you don’t raise the suspicion of an officer who may wonder why they can’t get your speed. (Hint: Turn your jammers off when you’re at the speed limit!)
In this guide, I’ll cover all the fundamentals you need to know about your ALP’s to make sure that you have the very best laser protection available. There’s quite a bit to cover, so I’m going to break everything up into different sections. You can read them all in order (I recommend reading everything if you’re new to this since every piece of the puzzle is important) and then skip around to the appropriate sections as needed once to review you’re familiar with everything.
Permanent link to this article: https://www.vortexradar.com/2016/01/everything-you-need-to-know-to-set-up-and-use-your-antilaser-priority-laser-jammer-system/
So this whole guide is pretty long and comprehensive and we’ve covered a lot. Here’s the step-by-step checklist of everything you need to do to get your ALP’s up and running and ready for action.
Installation
Choose the number of heads you need
Choose the best locations where your heads should go
Install your heads straight and level, with a clear view of the road ahead
If you’re running 2 heads up front, use just the F1 and F2 ports
If you’re running 3 heads up front, ensure the middle head is plugged into the F2 port
If you’re running a Tx head up front, ensure it’s plugged into the F2 port
If you’re running a Tx head in the rear, ensure the normal rear heads are plugged into the R1 port (using a splitter if necessary) and the Tx head is plugged into the R2 port
Install the control pad in a location that’s easy to reach while driving
Do a factory reset once your heads are plugged in and your ALP is powered on
Long press MENU to enter Yellow menu (LED will change yellow)
Copy down and save the serial number to your white control box
Download the latest firmware (Filename will be like U1234567.bin)
If you’re using the standard control pad, download the basic control set (UCSET.bin)
If you’re using the HiFi control pad, download the HiFi control set (UCSTHIFI.BIN)
If you’re using the HiFi control pad, download a voice pack (VOICEPCK.ALP)
Configure your ALP online and download the configuration file (config.alp)
Copy all these different files to your USB drive
Power on the ALP, plug in your USB drive, and allow it to upload all the files to your ALP
Using your ALP
If you’re using the Bluetooth module, download the app to your phone and connect
Practice moving your hand from your steering wheel to the kill button so you can find it by feel
Get your setup tested to insure your install is working properly
When you get notified of updates via email, install the updates accordingly
Thank You!
Thank you very much for reading this guide! I hope it helps you out and makes things easier and more enjoyable for you. 🙂
A big thank you to Tom at ALPriorityUSA.com for helping answer specific questions for this guide, for those who’ve allowed me to use photos of their vehicles for sample installs, to all the testers who’ve helped confirm the effectiveness of the ALP, and to the forum members online who help create a fantastic community to learn all about countermeasures!
Once you’ve got your ALP’s installed and set up the way you like, let’s talk about how to use them. For the most part they’ll sit in the background out of sight until you need them. The parking sensors will beep at you sometimes if you have that feature turned on, but let’s focus on the jammer functionality. It’s important to know how to use them properly to help avoid tickets while also not making it obvious that you’re using jammers.
Killing Your Jammers After You’re Shot
When your jammers are armed and ready, you’ll see a blue LED on the control pad.
When traveling below 18 mph, the jammers will be in detection only mode and the LED will be yellow. When you get up to speed, the jammers automatically arm and the LED turns blue.
Once you’re driving and get shot, your ALP alarm will go off and the LED will light up one of two colors: Red for front and Yellow for rear.
When your ALP’s go off, hit the brakes, reach your hand down to the control pad, and once you slow down to the speed limit, press either button on the control pad to kill your jammers.
If you have it set up to automatically kill your jammers, that will work too, but if you can kill them even sooner, you’re a rockstar. 🙂 That will definitely be to your benefit as to not raise suspicion with the officer, especially if you happen to be in an area where jammers are illegal.
If you do it right, it may take an extra second or two for the officer to acquire your speed (it is normal for a lidar gun to sometimes take a little longer to get a lock, especially with older guns or when shooting some sports cars that have a smaller target area), he’ll see you doing the speed limit, and he’ll simply target the next car. No problemo. Your heart will likely be pumping from the adrenaline, but that’s about it.
By default your jammers will sit back and wait 60 seconds before rearming automatically which is a good thing. This way in case he shoots you again, he can get your speed again no problem. If you’ve configured your ALP to rearm automatically and skip the 60 second warm-up, a few seconds after you kill your jammers and he stops shooting you, your jammers will rearm. You’ll want to keep your hand on the kill switch so that you can kill your jammers again if need be.
If you’re using the bluetooth module, you can tap anywhere on your phone’s screen to kill your jammers. If you’re running the app in the background on Android, the app will pop up in the foreground to make it easy to kill. On iOS, you’ll get a notification which you can tap on to bring up the app and then kill the jammers via a second tap in the app. The control pad is the easiest for this, followed by Android. iOS is tougher given the two steps needed.
You’ll want to practice this ahead of time and get it into your muscle memory so you can do it without thinking. To make it easy, you’ll want to place your control pad or phone in a convenient location where you can reach it and press it without looking, this way you can keep your eyes on the road and focus on the road ahead, the speedometer, and even your rearview mirror to make sure the car behind you doesn’t slam into you as you hit your brakes. 😉
The first time your jammers go off, you’ll probably get startled by the alarm and confused as to what’s going on, so that autokill option via the LID timeout in the settings is a great backup should you hear your alarms go off and instinctively brake in response, but not know what to do next.
Killing your jammers will keep you out of trouble and it’s best both for that specific encounter as well as for the long term well-being of the jammer community as a whole.
Using Your Profiles
If you’re using the profiles option in your ALP, you’ll want to remember what the profiles are for and what each one does. It’s easy to forget after a little while. If you have different profiles for different purposes such as when you’re driving, when someone else is driving your car, for testing, for reverting them back to parking sensors only, etc., you’ll want to remember which profile is which.
It’s handy to remember that the LED is blue for jamming mode, yellow for laser detection only mode, and green for parking sensor only mode.
If you ever forget how you set it up, you can always go back to your computer and create new profiles again so it’s no big deal.
Checking Your Heads Periodically
If you drive through mud or snow, you may get some build-up up on your jammer heads which could prevent them from working. Obviously you don’t want to speed in the snow or anything, but if you ever find yourself in a situation where your heads may be compromised due to gunk blocking their view, it’s good to check them and wipe them off if needed.
Additionally, over time your heads may move around a bit depending on how they’ve been attached to your vehicle. If you don’t have a super secure mount, you can inspect them every now and again to make sure that they’re still mounted straight and level. Don’t do it all the time of course, but just something to keep in mind down the road.
Staying Updated
You’ll be getting email updates periodically notifying you of firmware updates available for your jammer. Make sure you keep it updated as new updates are made available. If you have the bluetooth module, you can also update your jammers through your phone.
Need Support?
If you ever need help with your ALP or you simply want to learn more, there’s a number of great resources at your disposal.
The AL Priority support is also excellent. You can get help with anything from general questions about the ALP’s to specific installation questions for your vehicle, solutions to any problems that may arise, warranty service, and more.
You can also ask any questions down in the comment areas of the appropriate sections of this guide and I’ll be happy to answer. 🙂
Where to Buy
ALP’s are sold through a variety of different distributors and installers around the country. If you want to buy online, I recommend purchasing directly here:
You can find the AntiLaser Priority there, as well as all the different accessories you may need. If you want more information about the accessories, check out this short 1-page guide about the different accessories.
Thank You!
Thank you very much for reading this guide! I hope it helps you out and makes things easier and more enjoyable for you. 🙂
A big thank you to Tom at ALPriorityUSA.com for helping answer specific questions for this guide, for those who’ve allowed me to use photos of their vehicles for sample installs, to all the testers who’ve helped confirm the effectiveness of the ALP, and to the forum members online who help create a fantastic community to learn all about countermeasures!
Once you’ve got your jammers installed on your vehicle and configured the way you want, you’ll want to get them tested. Testing will help verify that your jammers are working properly and that there aren’t any weaknesses in your setup. Better to find out during testing than from your friendly local police officer! 😉
Note: Don’t test with police officers… There’s testing groups all over the country comprised of enthusiasts who own police lidar guns and help one another out to make sure that everyone’s installs are working properly.
Here’s an example set of test results.
JTG (Jam to gun) and JFG (Jam from gun) are perfect results. That means the gun was never able to get a reading. If you see a number, that’s how far away the gun was able to get a reading. Those are what we call punchthroughs.
As you can see, everyone there is running ALP’s, for good reason, and generally with various combinations of quads (4 heads) and quints (5 heads).
Even still, some cars had punchthroughs against certain guns which revealed the weaknesses in their install due to placement issues, not having enough heads, or misalignment of a head as you’ll see in the comments. This is what’s so valuable about testing and why I go into so much detail in this guide. Those issues can be resolved by following the recommendations I provide.
If you like, you can also purchase a used lidar gun on eBay and find out for yourself! You can test out your own vehicle and even offer to help out others. That’s what other people do and the more testers we have within the community, the better. You can buy any inexpensive gun online and it will do the job for testing purposes, or better yet, if you know what guns are used in your area (check the RDFGS to find out), you can purchase one of those guns specifically and that would be ideal.
Finally, let’s wrap up this series by going over using your laser jammers properly when out on the road.
Next we’ll set up and configure the ALP. Out of the box it ships as a parking sensor only so we’ll need to enable the laser jamming functionality and then customize the rest of the features we want.
Here’s a video that will walk you through the update process and explain what the different options mean. Note: New features have been added since this video was created in 2015. The written version (last updated in 2021) is under the video and has been updated to include new features.
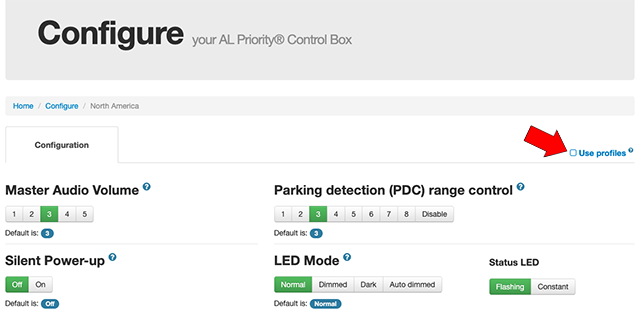
AntiLaser Priority Configuration Page
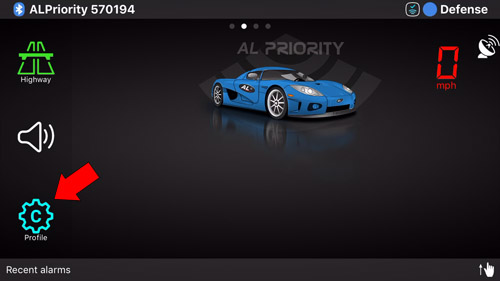
Go to alpupdate.com and then underneath “Configure,” click the blue Enter button.
Select the appropriate region.
You’ll be dropped into the configuration area.
Profiles
Profiles are super cool. Rather than run one group of settings, you can load in multiple settings profiles and switch between them on the fly between 3 different pre
defined configurations. For example, you can run your ALP’s in jamming mode for day-to-day use. If you see a cop ahead and want to be a superstar and kill your jammers before he even shoots you, you can switch over into detection only mode where you’ll get notified if he shoots you and even what lidar gun he’s using, but your jammers won’t jam him and you won’t raise any suspicions. You could also switch over to another profile that disables all lidar jamming and detection abilities altogether and leaves your ALP’s as parking sensors only.
Note: This feature is only available if you’re using the optional HiFi module or Bluetooth module. If you have the standard control pad, you can still use different profiles, but you’ll need to keep different USB drives in your car. Each USB drive will have a unique profile and you switch between profiles by physically plugging a different USB drive into the ALP.
If you’re using the HiFi or Bluetooth modules, go ahead and click the “Use profiles” checkbox in the top right of the configuration options page.
We’ll run through the individual settings first and then we’ll come back to the profiles at the end of this post and go over some profile combinations you may want to use once you’re familiar with the different options available.
Customizing Your Settings
Most of the options, like volume controls, are pretty self-explanatory, though you’ll get a better feel for them and may want to change some settings once you start driving. For example, you may find that the volume is fine when sitting in a quiet parking lot, but it’s too quiet when you’re driving on the highway with the windows down. (You can test this by entering the menu with the control pad while driving.) So feel free to configure everything and don’t be afraid to come back later and tweak things further.
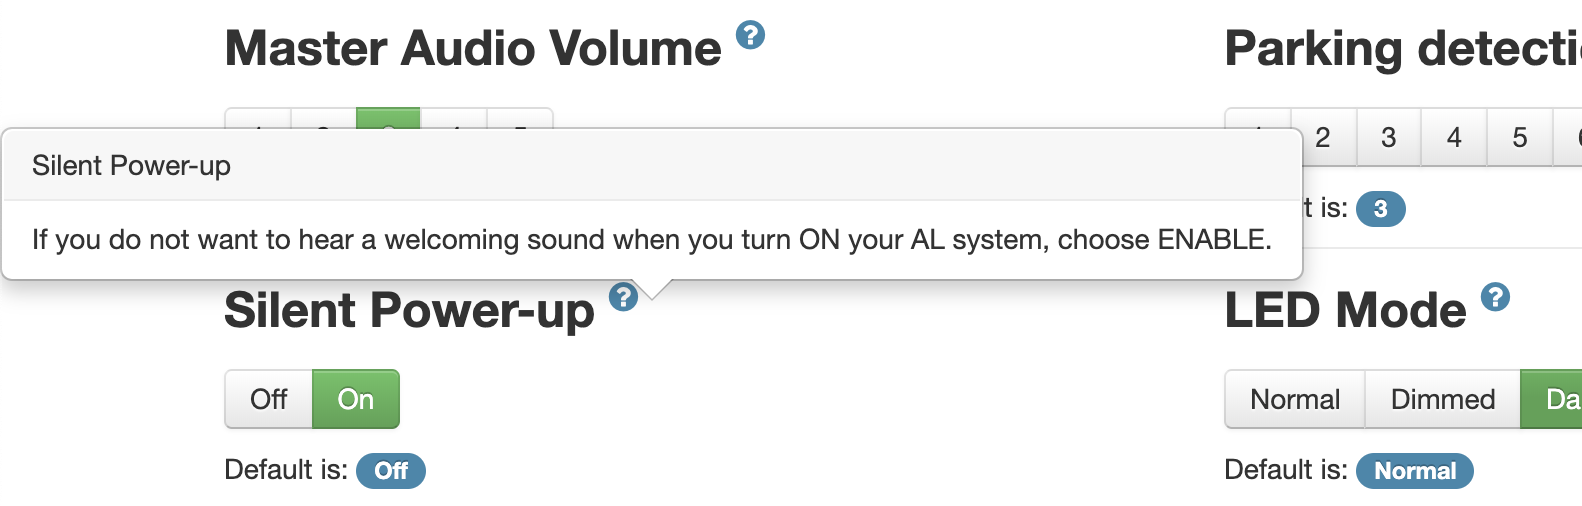
If you’re not sure what any option does, hover your mouse over the blue ? icon and it will pop up more detailed information.
Master Audio Volume: Adjusts the main volume of the ALP including menu beeps, parking sensor beeps, alarms when you get shot with laser, etc.
Parking detection (PDC) range control: Adjust how sensitive your parking sensors are. If you’re picking up other vehicles too easily in traffic, especially those with shiny chrome bumpers, you can back it off. If you want further detection range, you can crank it up. You can also disable the parking sensor capability altogether.
Silent Power-up: Quiets things down on startup for you.
LED Mode: The ALP has two indicator LED’s, one in the control pad and another external one you can place somewhere convenient. Under normal mode the LED’s are bright, under dim they’re dim, and under dark they’re off. Auto-dim automatically adjusts the LED brightness for daytime and nighttime driving based on the time of day and requires a GPS antenna. You can also adjust their brightness independently by selecting dim and then adjusting the sliders. Once you get shot or go into the menus, however, both LED’s will light up full power.
Status LED: Allows you to make the LED’s solid instead of blinking.
Parking detection and port monitoring: If you’d like to enable / disable parking sensor capability on individual sensors, you can do that here.
Installation on LCC equipped cars (laser anticrash): If your car has laser assisted cruise control or collision avoidance systems built-in, you can let the ALP know so it can filter out those signals. Note: This should only be used to filter out false alerts from your own vehicle, not from other vehicles around you.
GPS receiver present: If you purchased the optional GPS receiver, click yes to enable the GPS-related options.
“GPS Signal Lost” voice message: Customize how the ALP alerts you when it loses a GPS signal.
PDC SPEED limit: Disable parking sensor functionality when traveling above a certain speed. This requires a the GPS antenna. It doesn’t use your phone’s GPS if you have your phone connected via Bluetooth.
Enabling Your Jammers
Out of the box your jammers ship as parking sensors only and you’ll have to enable your jammers here. At the bottom under “Advanced Options,” you’ll see 3 different boxes.
PDC Only: Parking sensor only
PDC & DLI: Parking sensor & laser detection
PDC & LID: Parking sensor & laser jamming
Click on the blue box all the way over to the right that says “PDC & LID.” This will enable your jamming functionality and will open up more features underneath.
The alphabet soup of PDC, DLI, and LID I’ve never bothered remembering. :p In short, the left option (green) is your parking sensors only. The middle option (yellow) adds detection of laser guns and announcing what gun you’re hit with, but it won’t jam. The right option (blue) enables your laser jammers.
The colors also correspond to the colors of the LED’s on your ALP when they’re in your car. Basically remember that blue means you’re protected. Green or yellow means you’re unprotected.
Laser Jammer Specific Options
Audio volume of Laser Alerts: Adjust the volume of your laser alerts independent of the master volume.
Audio volume of Radar Alerts: Adjust the volume of your radar alerts independent of the master volume.
Pro Mode: By default when you get shot, your laser jammer alarm goes off continuously and the lights light up. The lights and sounds will stay on, even if the officer lets go of the lidar gun’s trigger. Pro Mode will make it so the LED only lights up when you’re actually being targeted so you get more information. There’s also an additional sound that will play only when you’re being shot. This is helpful to know exactly when you’re being targeted and when he stops shooting you, if you’re getting a direct hit versus perhaps picking up scatter, etc. Very useful feature. For simplicity’s sake you can keep Pro mode turned off, but having it turned on provides additional useful information during a lidar encounter and is recommended for advanced users.
Menu button short press function: With a single press of the menu button, you can switch on your fog lights (an ALP accessory available overseas) or switch your jammers into parking sensor only mode. The parking sensor mode is a useful option for people who use the standard control pad and want to kill their jammers before they’re shot. This will not provide laser detection, only parking sensor capabilities. If you’re using the optional HiFi module, keep this function disabled so it doesn’t conflict with using profiles which are activated by a double press of the menu button. I’ll cover profiles in more detail towards the end of this section.
LID Speed Limit: If you have the GPS antenna connected, you can have your laser jammer functionality enabled only when you’re traveling above a preset speed. To disable your jammers, you’ll need to either a) use the LID timer to automatically kill after a few seconds, b) press either button on the control pad during an alert, c) tap anywhere in the ALPconnect app when using Bluetooth on your phone, or d) using the Auto LID option to disable your jammers when traveling below a set speed. If you’re using Tx sensors, your jammers will turn on above 18 mph, a limitation ALP built in to protect against their competitors figuring out how the Tx sensors work by studying them in a lab.
Below set LID Speed Limit: When you’re traveling below your predefined speed you just set, do you want your jammers to switch to parking sensor only (PDC only) or both parking sensor and laser receiving mode (PDC & DLI)?
Auto LID: Enable this option to give your ALP’s the option to automatically kill your jammers when you drop below a predefined speed. When enabled, the different speed options will show up.
Auto LID Speed: Automatically kill your jammers when you slow down below your chosen speed. This is another great way to automatically kill your jammers when you brake. (This option shows up if you enable Auto LID.)
LID Time: One of THE MOST IMPORTANT THINGS to know about your jammer is that you NEVER want to jam a police officer for a long period of time. There’s a term for it called “Jam To Gun” or “JTG” where the officer starts shooting you and then you jam him continuously all the way until you pass him and so he gets no reading off of your car. This is a terrible idea, even if jammers are completely legal in your area. (You want them to stay that way, right?) The ALP’s do allow you to do this which is useful for testing purposes, but you can also have them automatically disable themselves after a preset period of time. The LID time is basically how long your jammers will jam for until they automatically shut off. Your goal is to get down to the speed limit within about 3 seconds or so of being shot and kill your jammers. You can kill them manually (Jam To Kill, or “JTK”) by pressing either button on the control pad and you can also have your ALP do it for you. 4-5 seconds max is a good rule of thumb. I wouldn’t recommend any longer. This is also a great option if anyone else drives your car, that way they don’t inadvertently JTG an officer if they get shot and don’t know anything about your ALP’s or JTK’ing.
After LID timeout: After your jammers time out, do you want them to immediately go into the warm-up phase or do you want them to continue detecting police lidar so you can tell how long you continue to be shot for? If you select “DLI & Warm-up”, your jammers will continue to alert you so long as you’re being targeted. Once you stop getting shot, your jammers will stop detecting lidar and go into the 60 second warm-up phase.
Laser Scanner Override: If you encounter the Poliscan which is typically set up as a fixed photo lidar system (in use in Maryland and in certain countries overseas), you can set the ALP for unlimited jam time specifically for the Poliscan, overriding the automatic shut-off features used for normal handheld laser guns.
Skip first warm-up: When you first start your car up, do you want your jammers to arm immediately or wait 60 seconds?
Poliscan: Enable / Disable Poliscan jamming abilities. The Poliscan is pretty tough to jam and there are some sources of Poliscan false alerts. There’s a filtering option available you can enable to help deal with these falses and it works great. If you’re still getting falses and don’t have the Poliscan in use in your area, you can disable Poliscan jamming capabilities altogether.
Poliscan false rejection (PFR): Enable filtering of Poliscan false alerts. Note: This feature shouldn’t be enabled if you plug older AntilLaser G9 or G9RX heads into your ALP CPU. (The G9 series jammers were the predecessor to the ALP.) If you’re using the newer ALP heads that come with the ALP, don’t worry about it. Leaving this on will help filter out false alerts.
Stalker: The default mode of “Max” could throw errors on some versions of the older Stalker LZ1 lidar guns and so you could switch to “Optimal” if you’re concerned about that. However, Stalker moved away from those guns in 2013 and they’ve since been discontinued so it’s recommended to set your ALP to “Max” nowadays.
VoicePack mode: Simple gives you a simple alarm when you’re shot while Detailed will announce which gun you’re being shot by which is very useful information.
Radar Detector Specific Options
Radar antenna model: If you have the optional Radar/GPS module and a radar detector such as the Net Radar DSP plugged into your ALP, you can select which radar detector you’re using and the customize the different radar detector specific settings and filtering options available. (We’ll go over the options for the NR DSP. Some options change if you select another radar detector, but many are similar.)
Activate dual mode: If you’re running both the original Net Radar and a second Net Radar MRCD antenna in close proximity, select yes.
Mark connected antennas: Front 1 is your NR or NR DSP antenna. Front 2 is if you’re using the optional NR MRCD antenna. (The NR DSP has MRCD capabilities built in and doesn’t need an additional MRCD-specific antenna.) Rear is for your rear antenna to give you directional information.
Note: Each of the different antennas need to be adjusted individually. If you adjust the settings for the Front 1 antenna, for example, you’ll still need to go in and configure your Front 2 and Rear antennas when applicable.
Radar bands: Select which radar bands, X, K, and/or Ka bands, you want the detector to pick up.
Ka-POP helps you pick up 67 ms Ka POP radar. Leave it off.
K-Traffic filter helps you filter out traffic sensors on the side of the highway. Leave off unless you get regular blasts of K band every mile or two as you drive down the highway.
K-filter helps you filter out false alerts from other vehicles with blind spot monitoring systems. Enable this.
K-POP helps you detect 67ms K band POP radar. Leave it off.
MRCD enables detection of the MultaRadar CD radar gun in use in Alberta, Quebec, and some places in New York.
K Band Options: Fine tune exactly which range of frequencies the detector alerts to on K band. Police in the US transmit across all of K band so K Wide is recommended.
Ka Band Options: Choose which segments of Ka band the detector scans for. With the original NR, the detector always sweeps all of Ka band and the segmentation options are just muting. With the NR DSP, Ka segmentation actually adjusts which frequencies the detector scans for which means you’ll have a performance boost if you disable unneeded segments.
In the US, you can set the NR DSP to scan for 2/5/6/8 and you’ll be set. I’d also recommend disabling K5 and only running 1/2/3/4/6 to cut out Honda/Acura BSM’s.
Ka band at Full Strength: For the first 3 seconds, treat every Ka signal as a full strength alert, then alert normally. Disable if you want a weak signal to sound like a weak signal when you first detect it (recommended).
Radar Filter Profile
Choose which radar filter profile is the default setting.
Highway is maximum sensitivity at all times.
City yellow filters out X and K band signals when they’re still weak, only alerting you to stronger signals.
City red is even more aggressive filtering, requiring signals to get stronger still before you get an alert.
You can change filter profiles on the fly by double pressing the power button (left button) on the control pad or by tapping on the filter setting on your phone app.
Radar Filter Thresholds
Adjust how strong a signal needs to get (on a scale from 1-10 where 1 is a weak signal and 10 is a full tilt strong signal) before your radar detector alerts.
Radar Automute
Alert at full volume for 6 seconds and then reduce the audio volume to a quieter level after the radar detector has your attention.
Radar Speed Limit
Low speed muting. The radar detector will only alert when traveling above a set speed.
Radar Speed Limit Bands
Choose if low speed muting applies to X/K/Ka bands or only to X/K. Ka is almost always a high priority and legitimate alert so it’s good to know about that even when traveling at low speeds.
Mute car-radio during Radar Alerts
If you’ve wired the stereo mute cable from the ALP into your stereo, you can choose if you want your radar detector to mute your car stereo when you get an alert.
Configuring Different Profiles
As mentioned in the beginning of this post, if you’re using the optional HiFi or Bluetooth modules and want to program multiple profiles into your ALP, you can do that. If you’re using the standard control pad, you can do the same thing but copying different configuration setups to different USB keys and then loading in the appropriate USB key as desired.
If you’re using the built-in profiles options, you switch by pressing the Menu button twice.
On the phone you’d click on the profiles button in the ALPconnect app.
To program the different profiles, you can click on the different tabs for Profiles A, B, & C at the top of the configuration page.
To the right of those tabs where you checked the box to enable profiles in the first place, there’s a pull-down menu to make it easier to copy settings from one profile to another.
Here’s an example of 3 different profiles I like:
Profile A: Jamming mode
4 sec auto JTK, Dim mode. Control pad glows dim blue so I know my jammers are turned on and armed without them being too bright.
Profile B: Detection mode only
Normal brightness, LED’s will glow yellow and are set to blinking mode to make sure it gets my attention and lets me know my jammers are deactivated. If I want to temporarily kill my jammers before I get shot, a double press of the menu button switches me into detection mode only. I’ll still get notified if I get targeted and which gun the officer is using.
Profile C: Parking mode only
Normal brightness, LED’s glow green and I have the Status LED set to constant to let me know they’re in parking mode without attracting too much attention to themselves otherwise.
Finally once you’re happy with the settings you’ve chosen, download the settings, copy them over to a USB drive, and plug that USB drive into your ALP.
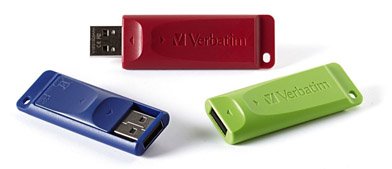
If you’re using the standard control pad and will be keeping multiple USB drives in your car, it’s handy to have them color coded so you know which is which when you reach for one. I like these Verbatim USB drives. The blue I use as my main jamming profile, for example. You can use any USB drives, of course. Just make sure they’re quality brand name ones. Don’t use cheapy ones which have been known to cause problems with the ALP.
Also, if you load the settings into your ALP and then later find you want to change something, if you’ve saved the file you downloaded from the website, you can reupload that file back to the ALP configuration website and it will automatically set the configuration page back up the way you last left it. Very handy!
Now that you’ve got your ALP set up, let’s talk about getting them tested to make sure they work and then how to use them when you’re out on the road.
Firmware updates are vital for your jammers. You get important bug fixes, helpful new features, and most importantly, updates to support new laser guns as they come out. Let’s go over how to update the different aspects of your ALP’s.
Firmware Update
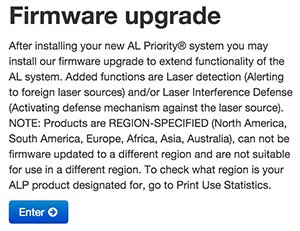
Go to alpupdate.com, then click on “Firmware upgrade.”
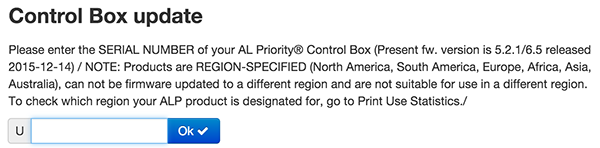
Under “Control Box update,” there will be a spot to enter in your control box’s serial number. It’s the same one we needed for registration.
The serial number is located on the control box itself (the main white box that everything else plugs into) as well as on the box that the control box ships in.
On the next page, solve the anti-spam math problem and then download the firmware update.
Note: Remember your control box serial number! You’ll need it again every time you go to update your jammers when new firmware updates are released. Once you install your ALP’s, it won’t be easy to find the number since your control box will be tucked away somewhere in your car and you will have already recycled the packaging box. I have the serial number saved in my password manager. Be sure to write yours down and save it somewhere you can access later too. The serial number for the individual heads you won’t need for updates, only the control box. If you have multiple ALP systems for different vehicles, you’ll need to save the serial number for each system.
Control Set Update
You’ll also want to update your control set, aka the control pad that you install somewhere in your cabin. If you have the standard control pad, not the optional HiFi module, download the “Basic Control Set.”
HiFi Module Updates
If you purchased the optional HiFi module to give you voice alerts, download the “HiFi Control Set” instead. You don’t need both.
Additionally if you purchased the HiFi module, download one of the voice packs. There’s different languages and different voices available. You can preview the voices and then download the one you prefer. I run the female English voice, but you can run whichever you prefer.
Note: Be sure to keep the filenames as-is. Don’t change them. You’ll also want to use a high quality USB drive like this one with your ALP. Cheapy ones have been known to cause problems with the ALP so it’s best to stick to brand names.
Copy all of these files over to your USB drive and then plug that USB drive into your ALP. This will take care of updating the different components of your ALP.
Performing a Factory Reset The First Time
The very first time you go to update your ALP, you’ll want to perform a factory reset first. You see, the ALP is smart and it learns how many heads you have plugged in to your ALP and even which ports they’re plugged in to. This way, if a head ever fails, you’ll get an error so that you can do something about it. It’s much better than finding out the hard way. 😉
Now there are many times that your ALP will be powered on before everything is all set up and installed in your car (factory test, dealer test, garage installer test, customer test, etc.) and so your ALP doesn’t know when everything is fully set up for driving. By doing a factory reset, the ALP will learn how many heads are now plugged in and if anything changes, you’ll get a warning. That’s why you’ll want to do the factory reset once everything is fully installed.
Here’s how you do the factory reset:
Long press MENU to enter Yellow menu (LED will change yellow)
Press NEXT (Menu Button) five times (5)
Press ENTER (Power Button)
Once that is complete, it’s then safe to start loading in updates, voice packs, and the settings you’ll create in the next section.
Next let’s go ahead and set up and configure your ALP with the settings that you prefer.
Once you get your ALP, you’re going to want to register it. The main reason is that once you register, you’ll get notified of updates to your jammer as they’re released.
Jammers are not something that you just install and they’re good as-is forever. You’ll want to keep your jammers updated as new features are released, bugs are fixed, and most importantly, support is added for new laser guns that are released over time. Registering will sign you up for email notifications of the latest updates for your ALP which are important to keep up with.
You’ll need the serial number for your ALP control box which is found both on the back of the big white control box, as well as the outside of the box it comes in. You’ll also need the serial numbers for the individual heads.
Save your control box serial number!
Write down the serial number for your control box and save it somewhere because you’ll need it again later to download firmware updates as they’re released.
You don’t need to save the serial numbers for the individual heads. Just the white control box.
Next let’s go in and update your ALP to the latest version.
Very thorough information on his site. I love his YouTube channel as well.
Dewayne G.
07:10 04 Aug 24
He gives great advise and helps you understand everything
Wes P.
14:48 02 Nov 22
A great source of information! Consistently updates when new information or products come out. Reviews radar detectors,... laser detectors, laser shifters, dash cams, and more!read more
Tommy W.
21:12 17 Jul 21
1. He’s honest!! 2. He knows what he’s talking about!! 3. He does in depth research!! 4. Only review/testing I... listen to!!read more
Saif K.
01:05 16 Mar 21
This guy will help you save money !!! Excellent accumulated experience, quick and in-depth reviews, and very useful... information overall. Significant personal annual saving on tickets ! I recommend Radar detectors for anyone who got more than two tickets within the last 5 years! and I recommend Vortex Radar as your one stop shop, for all the support you need for Radar Detectors, dashcams, and many other reviews 😀read more
Frank B.
18:45 17 Dec 20
Great reviews, in-depth and very thorough. Would love to see 2 channel dashcam reviews for convertibles with the... rear unit on the front windshield Blackview or Thinkware or any with cloud access. It would help decide which cam has better coverage through rear window. Thanks again for your efforts.read more
Jerry G.
01:08 17 Oct 20
unbiased reviews and will give you the best information possible on tbe products he test.
Steven H.
16:11 25 Jun 20
This guy yes I watch everything he does is the Master on radar detectors and counter measure equipment . He’s saved me... a lot of money on equipment buying and not waisting my money he’s the Man!read more
Tony S.
06:40 19 Jun 20
Exceptional YouTube channel dedicated to radar detectors. Thoughtful discussion - and solid technical conclusions.
Robert K.
17:31 16 Jun 20
What I like most about Vortex Radar is the fact that you give an honest review what's good and not good on all products.
Kyle S.
18:09 19 May 20
The most knowledgeable data based source for radar / laser detectors in addition to countermeasures. Very informative... in giving both manufacture details and real world test results. Check out the YouTube channel it is enjoyable to watch. I personally do not know of any other easily accessible source of information with such a wealth of content on this topic that is assimilated into an easy to understand format. Thank you for all the great content and advice.read more
Pete H.
15:20 25 Apr 20
There’s no one else that puts in the time and information about the radar community than him.
Joe T.
01:17 22 Apr 20
Notting but the FACTS and the 411 on all that you need to know.
Willie B.
01:24 22 Mar 20
Been a fan of radar detectors for over 40 years. Following Vortex radar detailed reviews and side by side comparisons... of the newest detectors allowed me to make a very informed decision on the best value for a windshield detector. Great page to follow.read more
Chris M.
18:59 07 Mar 20
If you're shopping for a Dashcam or Radar Detector, Vortex Radar is the one and only place to do your research! Vortex... does all the testing for you and lays out all the facts!read more
Shawn S.
00:41 03 Mar 20
Knowledgeable about Radar Detectors
Hal Y.
13:18 02 Mar 20
What you always wanted to know about radar detectors but were afraid to ask
Carter J.
17:07 22 Feb 20
Great Information and easy to understand! I wish all tutorials were like these. Great Job!!!!
Eric W.
01:42 28 Jan 20
I've been watching his Radar Detector for years. He really knows his stuff! Please keep up the great work!! ;-)
Aaron W.
18:04 22 Jan 20
Great source of unbiased info.
Glenn L.
14:17 05 Jan 20
Excellent non-biased recommendations.
Chris P.
17:27 22 Dec 19
Nice information to help you with making a choice
Martin L.
12:53 22 Dec 19
he is the go to guy for radar detector knowledge & makes informed videos.
Kat S.
22:24 16 Dec 19
Very helpful with making a decision on which detector to buy. Explains the features very well!
William F.
18:50 14 Dec 19
For up to date non biased information on radar and laser counter measures. He has very good information on dash cams... and storage too. I trust his reviews. Definitely pull good deals together and gives you options.read more
Andy B.
12:54 11 Dec 19
Very good and fair reviews and regular updates on a wide variety of products
Alc A.
23:13 06 Dec 19
There is no better hands on information source on countermeasure devices.
Atwell H.
20:04 06 Dec 19
Comprehensive, unbiased reviews and setup guides.
Ilan M.
08:32 30 Nov 19
very good information and short movies abaout the detecters.
Dennis L.
17:16 08 Nov 19
Wish they all were this good!
Tony L.
15:54 08 Nov 19
Vortex Radar provides a wealth of knowledge on all radar and lidar platforms. Anyone interested in learning more about... the speed countermeasure industry, Vortex is your guy!read more
John S.
14:10 31 Oct 19
Excellent information about "countermeasures" associated with safe driving. Everything is conveyed in simple form, and... to the point. Great production standards, too!read more
Mathew J D.
13:53 29 Aug 19
was a huge help on picking my uniden r3, lots of info on styles of radars for comparisons, to find what radar is best... suited for you and your style if drivingread more
Katheleen C.
08:59 19 Jul 19
I recommend the products and people reading the information on your web site to learn what is out there and available
Stan L.
13:01 13 Jul 19
I really like the idea of having the ability of recording my driving in case of a traffic incident
Bruce T.
15:31 12 Jul 19
Great resource for information on radar detectors and dash cams. Vortex knows his stuff!
Brian Douglas K.
02:34 08 Jul 19
great information and unbiased reviews
Fred S.
23:55 18 Jun 19
The fantastic unbiased reporting of the latest radar capabilities and the ability to Express the technical information.... Thank you all for the great updates and videos.read more
Bought an R7 on your advice and its been a great purchase. Keep up the good work!
Gern B.
07:15 18 May 19
Great advice, great tests, great videos, great attitude, great knowledge of his subject matter.
Fred M.
17:02 14 May 19
Most knowledgeable guy about mobile devices!
Lauren M.
17:42 11 May 19
high quality product, easy to follow instructions
Dan M.
19:47 02 May 19
Great find when I was looking for a RD. Honest assessments.
Jon V.
18:41 25 Apr 19
The most knowledgeable honest testing and recommendations on earth! Vortex you can trust!
John T.
23:35 23 Apr 19
The most complete and thorough reviewer of radar detectors. Tons of information here.
Hector M.
15:42 19 Apr 19
I like the share of information and ideas on the use and maintenance of radar detectors and related products.
Lester H.
00:49 01 Apr 19
Great Information and review to help make the best chose for you.
Jim L.
23:52 31 Mar 19
Great and knowledgeable site!
Jonathan W.
16:01 03 Mar 19
I completely trust the information that I get from Vortex. They have been a huge help with equipment training,... installation recommendations & instructions, to helping me compare products to make the best purchase. I cannot say enough good stuff about them.read more
Jonny S.
23:06 22 Jan 19
This guy is a radar guru!
His reviews are fantastic!
Phillip K.
04:03 21 Jan 19
Very knowledgeable and wonderfully detailed videos
Mike L M.
03:17 05 Jan 19
from what I've seen so far, good, fair testing.
David B.
15:56 26 Dec 18
The current GOLD Standard in detection news and reviews. I trust everything he posts!
James M.
14:00 26 Dec 18
This is my go to for radar detector knowledge, I want answers and he has them,
William Wendy Everhart I.
02:17 24 Dec 18
Performance warranted and best reviews online
John Matthew W.
00:25 19 Dec 18
Information is spot on if there’s anyone that knows anything here about Detectors here’s your guy ! I got all my info... from Vortex an have a nice collection thanks so much #Vortexradarread more
Robert C.
20:46 12 Dec 18
an insane amount of info. best Ever!
Plato Ioannis D.
18:23 09 Dec 18
Expert advice on Dashcams and radar detectors
Chris B.
17:07 09 Dec 18
love checking in to see what this guy has in store for the different reviews. Only resource I know of right now that is... this thorough.read more
David Ket S.
01:22 09 Dec 18
Excellent information for newbies or Pro’s. Love there unbiased reviews of multiple detector types. Look forward to... learning more tips about my favorite detectors!!read more
Robert P.
16:09 08 Dec 18
Very informative channel for Radar Detectors and Dashcams!
Albert D.
06:11 08 Dec 18
great content and honest reviews
Craig M.
01:12 08 Dec 18
Great advice and reviews!
Gary G.
22:44 07 Dec 18
Great website and video content!
John N.
17:42 07 Dec 18
Awesome videos. Love my R3. 😎
Robert D.
15:36 07 Dec 18
Very knowledgeable about the product
Brian St D.
15:13 07 Dec 18
Great informative videos on radar detectors (and related stuff).
Derrick L.
15:00 07 Dec 18
Great information and knowledge or products
Thomas W.
13:18 07 Dec 18
Very informative and unbiased reviews.
Tim S.
07:51 06 Dec 18
It’s a great Radar detector
Les Y.
22:54 05 Dec 18
Great reviews and advice on youtube channel and the forums
Allen W.
22:24 05 Dec 18
I have been watching YouTube videos for a while and have learned a lot of useful information on radar detectors and how... to set them up properly. Thanksread more
Brian B.
22:07 05 Dec 18
Best and most informative website for all things radar detector on the internet! ...and dash cams!
Ron S.
04:44 04 Dec 18
Very informative and knowledgeable about a variety of radar detector products... Product areas also include laser... jammers and dash cams.. As a technician I recognize good testing methods and appreciate the unbiased reviews of the products featured...read more
VD V.
07:15 28 Nov 18
Very professional reviews, tests in details, nice videos... he is awesome!!! 😍😎👍
Gene E.
15:37 01 Nov 18
Great infomation No bias in his reporting.
Benedict De Leon A.
01:26 28 Sep 18
Great Content and Very Informative videos
Ted D.
23:33 23 Aug 18
real pro can learn a lot
Troy N.
03:46 18 Aug 18
Vortex is one of the most knowledgeable guys in the countermeasure community. His non-biased approach makes it very... easy to trust what he says. If you are looking to buy a radar detector or laser jammer, check out his videos before going anywhere elseread more
Asa E.
23:19 17 Aug 18
Great content and very informative.
Eric C.
16:00 09 Aug 18
simply the best place to get the best information and recommendations, thanks for all your great work
Kevin M.
09:19 07 Aug 18
Outstanding U Tube channel. Very informative and answered a ton of questions I had.
Tim C.
00:22 06 Jul 18
Vortex is awesome. Best instructional and detailed videos ever. Sold me on the Uniden R3, and it was the best choice!... Thank you!read more
Gabriel R.
18:09 29 Jun 18
Great Page I have a V1 and just bought a Uniden R3 & love it to your reviews helped Big time cant wait to post my... reviews on the R3.read more
Παναγιωτης Ν.
15:40 29 Jun 18
Top!
Rick M.
11:18 28 Jun 18
very informitive
Rodz R.
08:05 28 Jun 18
clear explanation on products ,clear how to videos
Erwin Y.
11:34 22 Jun 18
Thanks a lot Mr. Radar expert, really helped out on my purchase of an R3, especially the upcoming support for MRCD... photo radar. Changed my mind from Escort based on your videos and saved a ton of $$$.read more
Marc M.
15:11 19 Jun 18
This guy is the king when it comes to detectors. Incredible knowledge and willing to share what he knows.
Solano H.
16:54 08 Jun 18
The best radar detector expert in the world and a very nice person that I will be honor to meet in my next trip to USA.... Gretings from Brazil.read more
Lucas C.
02:02 03 Jun 18
Sherry H.
21:14 26 May 18
ENTER TO WIN A HIGH TEC BACK , FRONT AND PARK VIEWING CAM!
Ed A.
02:22 19 May 18
Jerry N.
02:10 16 May 18
Bryon V.
21:46 14 May 18
Questions answered promptly, great informative videos! Has taken over the helm left by Radar Roy!
John W.
16:24 23 Apr 18
Everything you'll need to know about Top Detectors this man has you Covered reliable Information and that's Facts I... really Enjoy His Videos online an on Youtube , many Reviews I've learned alot an really enjoy the Collection I own thanks to Him.read more
Brian P.
01:01 12 Apr 18
David E.
04:50 01 Apr 18
The go to guy for anything about radar/laser detectors
Brian L.
06:41 18 Mar 18
Dwight G.
23:27 17 Mar 18
Dennis A.
21:25 12 Mar 18
Brian H.
03:47 12 Mar 18
Ryan B.
23:31 09 Mar 18
He's one of the most informed and definitely the most honest person you'll find when it comes to detectors and... countermeasures in generalread more
Alex B.
08:23 09 Mar 18
Anton F.
23:59 16 Feb 18
William R.
21:03 28 Jan 18
I appreciate the extensive time and effort Vortex has devoted to the subject of radar detector technology. His in depth... reviews and analyses of the products currently available has greatly helped me determine what is best for my needs.read more
Sean Mashimarho R.
23:57 02 Jan 18
Awesome guy to work with. Very honest, personable, and has a passion for what he does.
Tom A.
02:19 30 Dec 17
Excellent reviews of all the radar detectors. Great source of knowledge
Chris M.
19:26 14 Dec 17
Best videos to learn about old and new radars. He's always keeping us updated on Radar news, updates, tests, and... reviews.read more
Ty C.
12:57 12 Dec 17
Alway share valuable information. Im still undecided on which radar detector is right for me. Uniden R3 or the Radenso... pro So many choices...lol🤔read more
Bill B.
09:06 12 Dec 17
One should never buy a radar detector without first checking the reviews published by Vortex Radar for the various... products on the market. Absolutely a essential resource for decision making.read more
Jc B.
08:57 12 Dec 17
your videos are very informative and has helped me select the best detector for my needs! thank you!!
Kirk A.
22:16 11 Dec 17
Paul V.
04:47 07 Dec 17
It is always nice to watch Vortex videos. Simple-speak of complex gear, done by a guy who ENJOYS what he sharing. Sorry... to learn of your Miata getting smacked; glad you’re ok. I drive a new Miata and run a Uniden R3. I picked my car, but Vortex picked my R3 after following his research and testing. Best regards sir!read more
Cristi M.
16:40 01 Dec 17
Clarence Glynn J.
18:38 24 Nov 17
Aissam B.
22:23 20 Nov 17
Jose Santana Y. Norma C.
00:13 15 Nov 17
Andrew G.
15:49 04 Nov 17
Love all the informative videos. Thank you for sharing!
Matthew W.
19:55 07 Oct 17
Thank you so much for the reviews and videos of how to program and setup my R3. I purchased the R3 solely based on your... videos and recommendations. Best review and how to videos ive ever watched. I absolutely love this thing!read more
Brian S.
13:53 05 Sep 17
Great advise on the videos. This helped a lot on narrowing down so many choices.
Steve C.
23:08 27 Aug 17
Terry A.
03:24 19 Aug 17
Brandon S.
19:25 31 Jul 17
Brandon B.
20:14 19 Jun 17
Curt C.
20:45 15 Jun 17
all is reviews are on target i do alot of reviews before i buy something an out of all the utube guys an gals this guy... is far better than anyone out there now with that said i think i deserve a 10% discount thats how it works i give you a good review i get mnie too lol just kidding keep up with the videos thanksread more
Bobby B.
13:00 15 Jun 17
Brett W.
05:41 09 Jun 17
Tom Logan I.
04:57 22 May 17
Great unbiased reviews. I just put myself on the waiting list for the Uniden R3.
Kent Riegl J.
01:17 16 May 17
I THINK...all the information they have on RADAR DETECTORS AND RADAR/LASER JAMMERS IS REALLY CLASSIC AND COOL....
Lutu R.
03:39 11 May 17
Richard A.
20:42 09 May 17
Great unbiased reviews. Very thorough / excellent video quality. Full look at all the features and comparison points.
Donny C.
22:35 14 Apr 17
Love the reviews, tips, and tricks! He has even taken the time to respond to questions concerning setups and... installations! Thanks to his advice I was able to hard-wire my Valentine1 in my MX-5. Awesome guy with awesome content.read more
Anthony F.
15:39 05 Mar 17
Glen B.
00:08 03 Mar 17
Wonderful tutorials and a wealth of knowledge! There is so much information here that will help one in finding answers... to the many questions that arise.read more
Patrick P.
10:39 10 Feb 17
Awesome reviews glad to see some one honest and non bias keep up the good work mate :)
Bart R. D.
03:34 25 Jan 17
Jonathan F.
22:40 28 Dec 16
Awesome information. Reviews are spot on with his competition. More importantly, he is not a salesman.
Joshua S.
06:10 28 Dec 16
Tyler B.
20:10 09 Dec 16
He seems to be a great, honest guy. His reviews seem to be honest, straight forward, and correct.
Natalie B.
13:36 02 Dec 16
D'Arcy R.
00:18 26 Oct 16
Incredible knowledge of radar detectors. Keep up the amazing work!
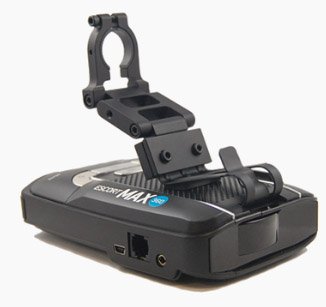 So I just got off the phone with Blendmount today after having a chance to review their Blendmount. They liked my review and we had a chance to bounce some ideas off one another. One comment that people brought up about the Blendmount was the price so they gave me a Blendmount coupon code to help save you guys some money on the mount.
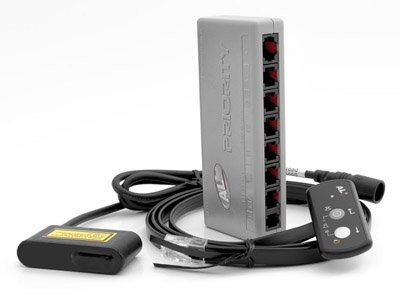 Updated: November 2017
 Compared to the previous generation laser jammers out there, the ALP is also more sensitive at detecting lidar than other jammers which means that they’re better at protecting your entire vehicle, the increased sensitivity means you’re less likely to have a weak spot on your vehicle far from the jammer that a gun can get a reading off of, you have more options in terms of placement of the jammer heads on your car while still maintaining solid protection, plus they’re more forgiving of less than perfect installs or heads moving over time which can lead to punchthroughs (a lidar gun getting a reading off your car while your jammers are trying to jam it). Because the ALP’s can run up to 6 heads instead of 4 (up to 3 per side of the vehicle), it means that if you need more than 4 heads (common for larger vehicles), you can simply add an additional head rather than having to buy another system entirely which is more expensive and leads to more unnecessary duplicate hardware in your vehicle, dual kill switches, and so on. Being able to plug additional heads into a single ALP brain is great.
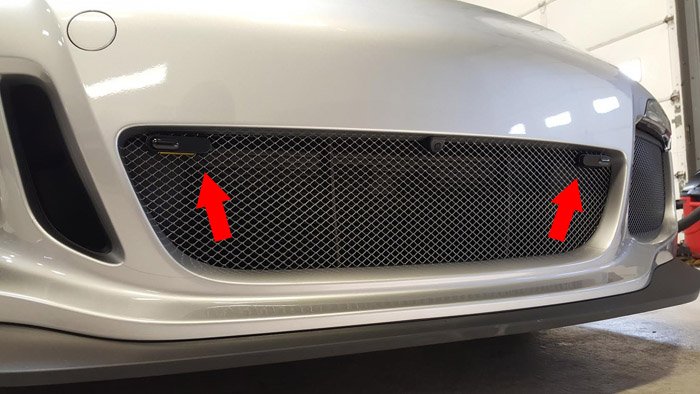
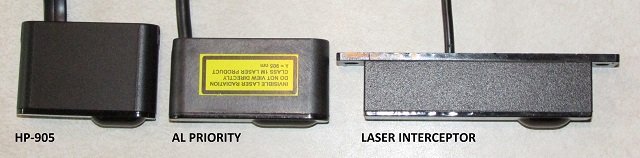
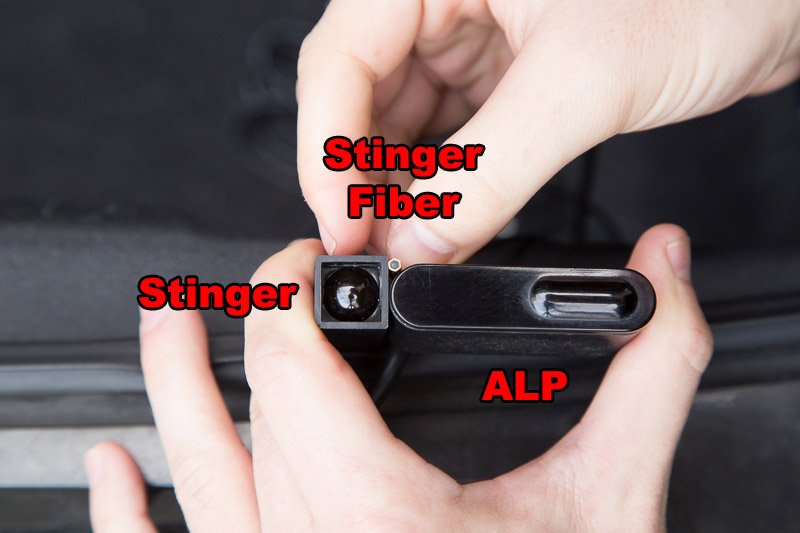

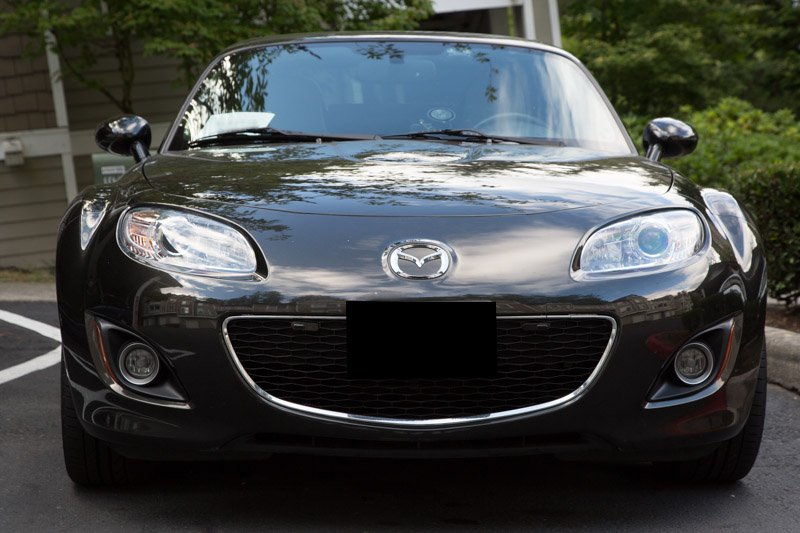
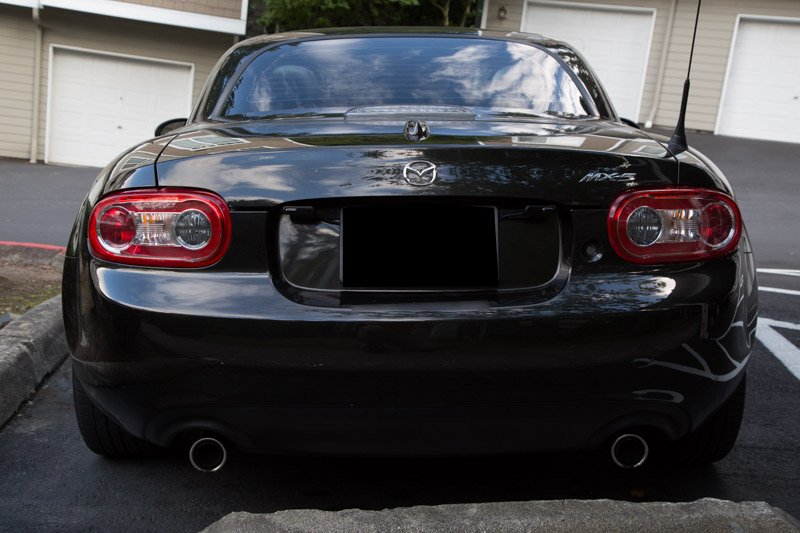
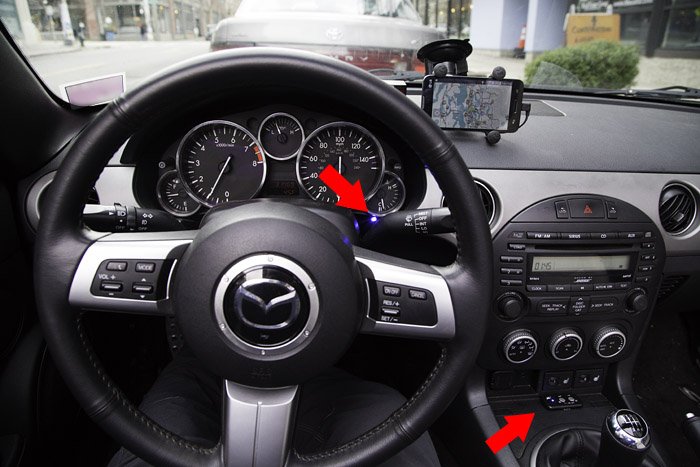
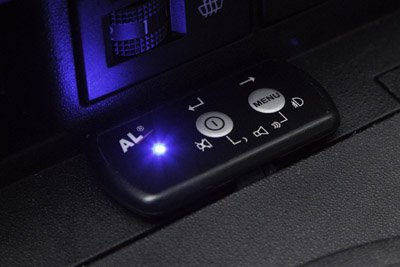
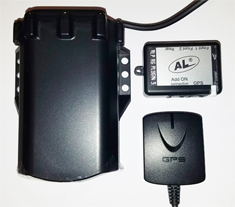
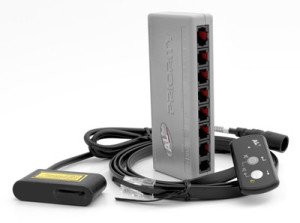
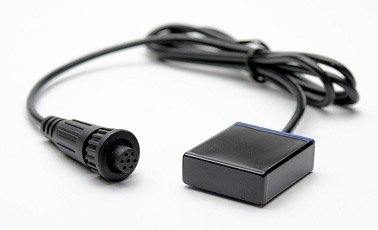
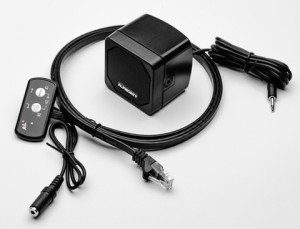 The HiFi module adds an external speaker to your ALP to give you not only louder alerts which you can hear better over any music or road noise, but it will also announce what gun you’re being shot with, it makes it easier to navigate the menus since it tells you what menu option you’re accessing (otherwise you have to look up what different beeps and LED colors mean), and it allows you to use several different profiles at once so you can quickly switch settings on the fly.
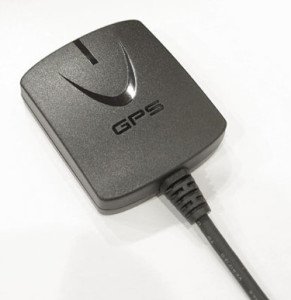 You can plug in a GPS antenna to add some speed-based functionality to your ALP. For example, you can give yourself low speed muting for radar, have your laser jammers automatically disable at low speeds, have your parking sensors disable at higher speeds, plus the GPS antenna is required for the Tx sensors. Additionally, you can have your ALP log how fast you were going when you got shot so you can see how big of a save you got and the ALP can also function as a VBOX and measure your vehicle’s 0-60 times, so there’s a bunch of useful features that the GPS antenna offers.
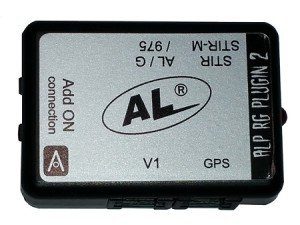 The RG module is designed to allow you to plug in your Net Radar radar detector antenna into your ALP if you’d like to add a radar detector to your laser jammer and have an integrated radar and laser setup. The old version of the RG module (RGv2) supported antennas such as the STi-R Plus, 9500ci, Radenso HD+, and V1, but that module has been discontinued and most of those radar detectors have since been discontinued too. The latest version of the RG module (RGv3) is specifically designed for Net Radar and Net Radar DSP integration and so if you want a radar detector to pair with your ALP, the latest version of the RG module you’ll see online is the one to get.
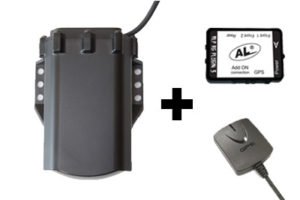
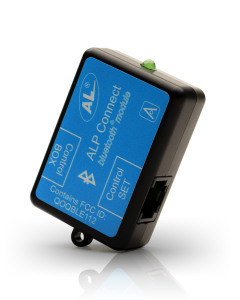 LP with your phone and it works on both Android and iOS. With your phone you can update your ALP’s firmware directly through the app rather than needing to download the update on your computer and transfer it to your ALP with a USB drive. You can also adjust your settings through the phone while sitting in the car. Like the HiFi module, you can add voice alerts, except the audio will now play through your phone’s speaker or through your car’s stereo over Bluetooth. Here’s a quick demo of how the alerts look and sound over Bluetooth:
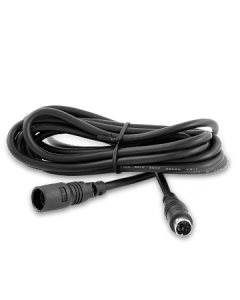 The cables that connect the ALP heads to the CPU are 5m (16.4 feet) long. This is generally enough for connecting the front heads, but for some vehicles you may need an extension cable for the rear heads, especially when you are running the wires under and around the trim of your vehicle. The extension cable will add an additional 2.5m (8.2 feet) of length. You’ll need one extension cable for each head you’re extending the length of.
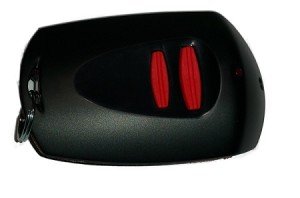 If you want to test your ALP and verify that the heads are working, having a device that can trigger your ALP is very handy. This pocket tester simulates the pulse pattern of a bunch of different lidar guns. It’s great for not only verifying that your ALP works properly, but also to troubleshoot if you suspect that one of the heads isn’t responding to lidar. The ALP does its own self-check and will let you know if a head fails at any point, but this is a great add-on as well.
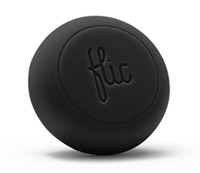 Finally, the last accessory to consider is a wireless Bluetooth button called the Flic that adds a dedicated control button to your ALP to let you do things like kill your jammers, mute or lock out your radar alerts, and power the system on and off.