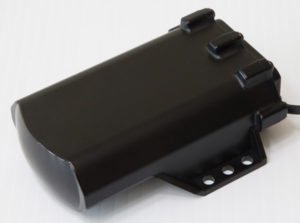
 The Net Radar is a remote radar detector designed to be installed in your grill and plugged into the AntiLaser Priority laser jamming system to offer you a fully integrated radar detecting and laser jamming setup. You can check out my impressions of the Net Radar here. Now there’s actually several different Net Radar antennas you can purchase, depending on your needs.
- Front antenna: Primary radar detector everyone will need.
- Rear antenna: Optional to give you improved radar detection from behind. A firmware update is coming to add directional information, aka arrows, if you have both a front and rear antenna.
- Front MRCD antenna: Optional antenna for those who live in Edmonton, Alberta or around Quebec where the MRCD is in use.
Now to configure your Net Radar, there’s actually two ways of doing it. The traditional way is to configure everything on your computer via the ALP website, download the config file with your settings to your computer, take it over to your ALP in your car via a USB stick, and plug the USB stick so the ALP can apply those settings.
The second way is to do things through your phone if you have a Bluetooth module. You go into the app’s settings, find the section to configure your ALP online, click “Modify” to go to the website online, create all your settings on the website, save the settings, then download those saved settings through the app again to apply them to your ALP.
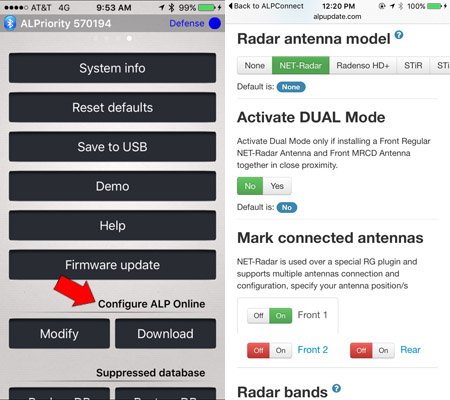
Ultimately both methods require you to go the same website and so you’ll find the exact same options either way. For the sake of this example, we’ll assume you’re doing it through your computer.
Start off by going to alpupdate.com/ConfigureNew, select your region (ie. North America), and then if you’re running the HiFi module or Bluetooth module and not just the standard ALP control pad, click the “Use profiles” box over on the right.
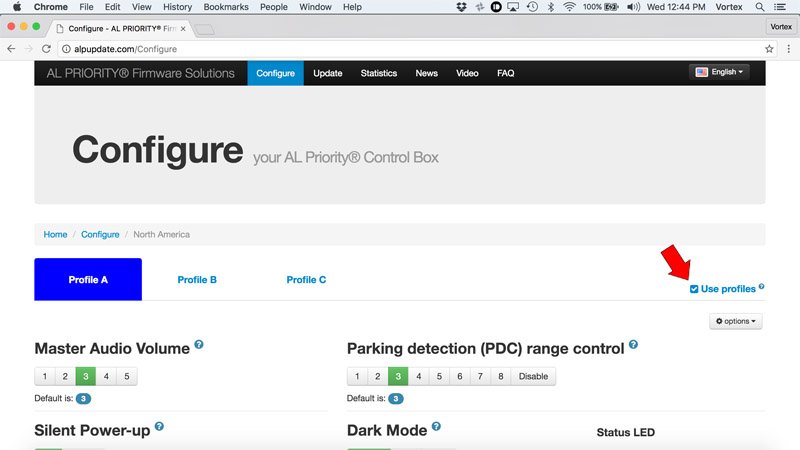
Profiles will let you build 3 different preset settings profiles that you can switch between on the fly using your phone or hifi module. These profiles affect both the laser jammer and radar detector settings. You can switch different profiles to do things like enable your jammers or set them to parking mode, change different filtering settings on your radar detector, and so on.
For now we’re going to dive down and just run through all the settings. To save yourself sometime, you can always choose all the settings you want, go back to the top and click the “options” button underneath “Use profiles,” and copy all the settings from one profile to the next, this way you don’t have to start from scratch with each different profile.

Under “Advanced options” make sure you select either “PDC & DLI” or “PDC & LID” in order to enable the radar detector functionality. If you have your jammers set to “PDC Only,” you won’t find any options for your radar detector and it will be disabled.

Scroll down to “Radar antenna model” and select “NET-Radar.”

If you’re running both the regular Net Radar antenna and the MRCD antenna up front, it’s recommended to mount them on opposite ends of the car at least 30-36″ apart. You can mount them closer if need be. If you do, you may get false alerts between the two antennas. To fix this, activate “Dual mode” which will reduce the sensitivity of your antennas but will take care of the false alerts.

If you’re running the normal front radar detector antenna, turn “Front 1” on. (This will apply to virtually everyone.)
If also you’re running the MRCD antenna up front, turn “Front 2” on as well.
If you’re running a rear antenna, turn “Rear” on.
Note: The settings for each antenna are adjusted individually and by default all bands (X, K, & Ka band) are enabled. Some people have disabled certain bands on their front antenna but kept getting alerted on those bands because they didn’t also turn those bands off on their rear antenna. Make sure you adjust the settings for each antenna individually. 😉

Here you can enable/disable individual bands as needed.
If you’re wondering which bands are in use in your area, I’d recommend checking the RDFGS. I’m also working on a simplified version of that so you can see what settings you need across the country at a glance. To see the latest version of the simplified map, click here.
POP you can generally disable since it’s not actively used.
K-Traffic filter is TSR/TMF. If you have traffic sensors in your area (again reference the RDFGS if you’re not sure), enable this filter. Otherwise disable it for better K band performance.
K-filter is your blind spot filter. It’s very effective with the Net Radar and one of the best implementations of this filter around. It doesn’t filter out every false alert, but it does get most of them. Keep it enabled to cut down on false alerts from cars around you with collision avoidance systems and blind spot monitoring systems.
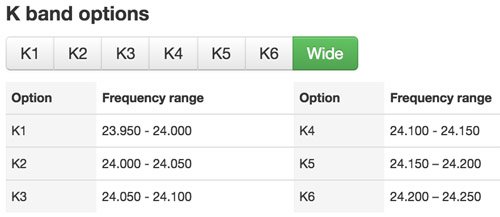
If you’d like to segment K band to disable certain sections, you have that option. However, legitimate K band can be seen all over the K band range so unless you have a specific reason to disable certain segments, it’s best to leave K band set to “Wide.”
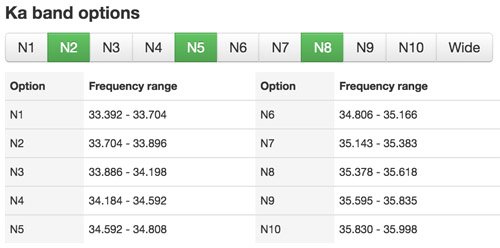
You can also segment Ka band if you wish. The segments are set up the same as other manufacturers so you can simply set it up to scan for segments 2, 5, & 8 to get the standard setup for the US. There doesn’t seem to be much of a performance difference with different segments on/off so feel free to enable more segments to catch out of tune guns or disable segments if you know for sure that certain frequencies aren’t in use in your area.
Note: This is an advanced option so I’d recommend these standard settings unless you know what you’re doing. See this article for more in depth information on Ka band segmentation.
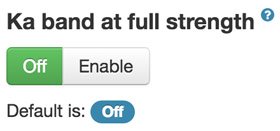
If you’d like your Net Radar to alert at full strength for the first 3 seconds when you initially get an alert, enable this option. However, I prefer leaving it at the default setting of Off to hear the rampup of the signal and get a better feel for the threat level and what’s going on around me.
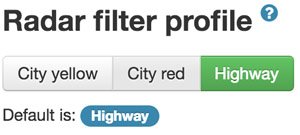
Here you can adjust the sensitivity of your detector to quiet it down around town. Highway mode gives you full sensitivity on all bands. The city modes will cut down on your sensitivity (you can adjust by how much) to filter out weak alerts.
If you’re using the standard control pad or the HiFi module, when the detector is picking up a signal that it’s filtering out, you’ll get no visual or audio alert.
If you’re using the bluetooth module, when the detector is picking up a signal that it’s filtering out, the City icon will blink on your phone but you’ll receive no audio alert.
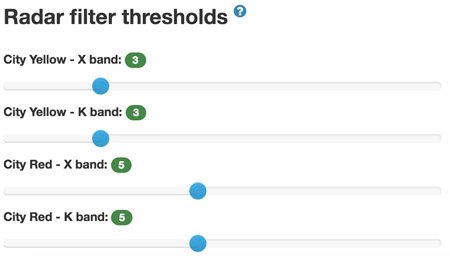
Here you can set how strong the signal needs to be (from 1-9) before it alerts you.
Any signals that are weaker than your thresholds will be filtered out. When you detect signal at or above your threshold, you’ll get alerted to those signals normally.

To quiet things down, if you want your Net Radar to automatically reduce the alert volume after 6 seconds once it has your attention, enable the automute feature.

If you’ve attached the stereo mute wire to your stereo, if you’d like your Net Radar to mute your stereo every time you detect a radar alert so you can hear the signal better, enable this option.
Finally, once you’ve configured everything the way you want, scroll back up to the top to “Use profiles” and click on the “options” button underneath.
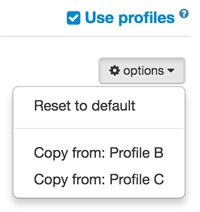
You can copy the settings you just created to the other profiles and then go in to the other profiles, change any settings as you wish, and switch between different settings on the fly.
Once you get everything configured the way you want, to download the settings to your computer, click the Download button at the very bottom.

It’ll take you to another page with some additional instructions. Basically it’ll download a file called “config.alp” which you’ll want to copy to a USB drive and then plug into your ALP.
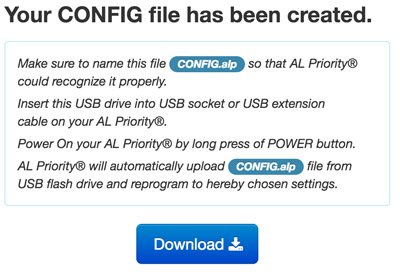
It’ll take just a few seconds to load the settings into the ALP and then you’re ready to go!
If you’re using the standard control pad which doesn’t support profiles, you’re all set.
If you’re using the HiFi module, you can switch profiles by double-tapping on the right button on the control pad. The LED will change colors and it’ll say “Profile A” or “Profile B” or “Profile C” to confirm your new profile. Here’s a quick video demo.
If you’re using the Bluetooth module, tap on the profile letter on your phone, give it a second to switch profiles, and you’ll see the next profile loaded on screen. Here’s a quick demo.
There you go! Now you’re up and running. 🙂
Enjoy!
You can purchase the Net Radar here.
| This website contains affiliate links and I sometimes make commissions on purchases. All opinions are my own. I don’t do paid or sponsored reviews. Click here to read my affiliate disclosure. |


9 comments
Skip to comment form
Hello, first of all, I want to say thanks for all of the useful information you’ve posted on radar and and laser systems! I’ve ordered a 5-head ALP laser system along with the Net Radar add-on (front and rear antenna) for my M2. I have one question I’m hoping you can help me with. You mention at the start of your post that “The Net Radar is a remote radar detector designed to be installed in your grill…” It seems from reading the forums that radar antennas shouldn’t be behind any grills. Is it acceptable to mount the Net radar antenna behind my vertical or hexagonal grills? Any information you could provide would be greatly appreciated!
Cheers!
Author
Congrats! That’s a great setup.
and you’re right, you don’t want it behind your grill for sure. The ideal location is in the grill area with a clear line of sight of the road ahead. BMW’s have vertical slats in the grill while other cars have horizontal slats and so a RD could be easily slotted between horizontal slats with nothing in the way. With a BMW, usually the lower air intake area is a good mounting location. You could also go behind a body panel, so long as the body panel is flat, non-metallic, and doesn’t have any metallic paint.
Thanks very much for getting back to me, and for the advice!
Cheers!
Firs and foremost, thanks for all of the extensive knowledge and testing on these units! I have one question about net radar though. Can you mark mute locations (with alp net radar) without using a phone app while driving? I prefer not using it because the Bluetooth in my car doesn’t always work well and I don’t want to mount my phone every time I drive. Plus, I don’t want a phone mounted to my dash. I like the clean look. I have a Uniden R3 in my other car and love it so much I’m about to disconnect the net radar and get another R3.
Author
Hey Ian! So the NR requires a phone to do the lockouts right now. You don’t necessarily need your phone to be mounted for it to work. You will need access to your phone initially so you can go into the app and mark what are false alerts (or just activate a learning mode where it locks out every signal on the first pass). Once you have everything set up though, it can all work with your phone in your pocket and the lockouts will happen in the background.
Can you still use the keypad and hifi module for the audible alerts and to kill the jammers? I have the gps antenna. The way I understand it is you either have to use the phone (I have a iPhone) for alerts, marking false alerts etc or the hifi keypad and you can’t mark false alerts. The Bluetooth in my car (15 corvette) is terrible and I’m afraid I’ll miss a alert or sometimes after getting a alert, the radio doesn’t go back to music.
Btw, thanks for the quick response!
HI I HAVE JUST FITTED NET RADAR AND WHEN I GO INTO ALP UPDATE CONFIG THEN SELECT PDC & LID TO PROCEED FOR RADAR SETTINGS THE RADAR ANTENNA MODEL IS NOT GIVING NET-RADAR AS A OPTION SETTING, CAN YOU ADVISE PLS
Author
There’s really no trick to it. Under “Radar antenna model,” just select “NET-Radar.”
hi thank you for that info, but the problem is as stated early ,when you select europe and then go radar antenna just select net-radar is nor given as a option, try it. but if you select say north america then it is no problem as you get net-radar as an option.. now since it is stated that alp is region controlled this leaves me with a problem how to config net radar to my alp..any help would be appreciated